
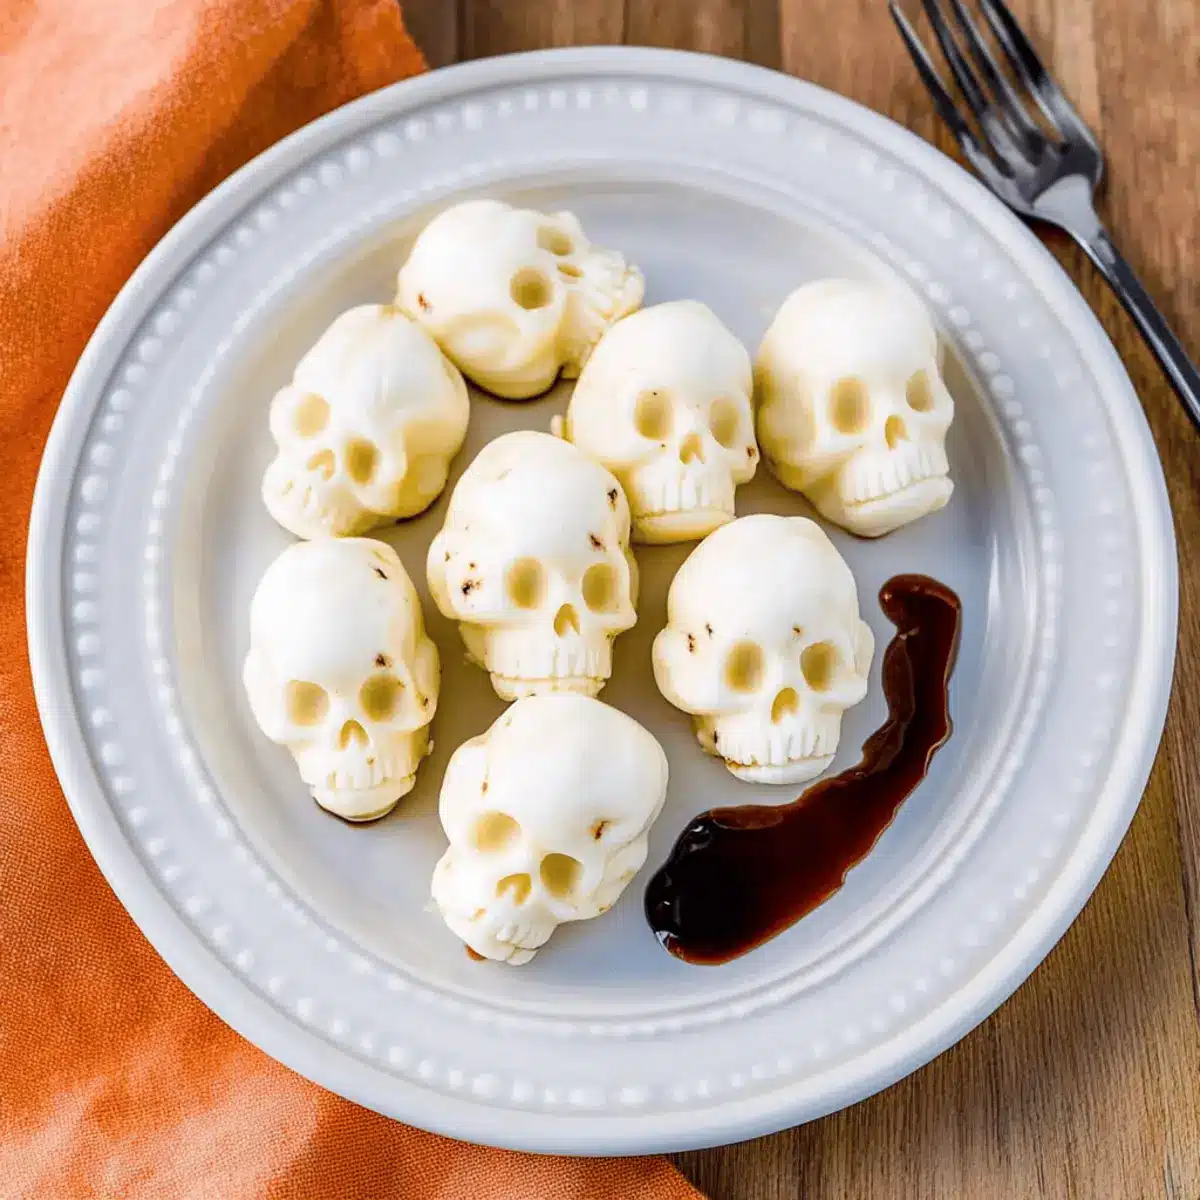
As I pulled a tray of delightful mozzarella cheese skulls from the oven, the warm, cheesy aroma filled the air, instantly transforming my kitchen into a Halloween haven. These whimsical little bites aren’t just a treat for the eyes; they offer a creamy, stretchable texture that makes them irresistible to both kids and adults alike. Perfect for Halloween gatherings, these Mozzarella Cheese Skulls serve as a fun and creative appetizer that is bound to be a conversation starter. Plus, they’re incredibly easy to whip up, allowing you to spend more time enjoying the festivities and less time worrying about the food! Curious about how to create these spooky delights for your next party? Let’s dive in!
Why You’ll Love These Mozzarella Cheese Skulls
Endless Creativity: Your imagination runs wild with spooky shapes! Use different molds for unique Halloween designs, like ghosts and pumpkins, ensuring a festive twist.
Quick and Simple: With just a few steps, these mozzarella cheese skulls can be prepped in no time, letting you focus on your Halloween fun rather than labor-intensive cooking.
Crowd-Pleasing Appetizer: They’re not just cute; their creamy texture and rich flavor will have your guests coming back for seconds, making them the star of your Halloween spread.
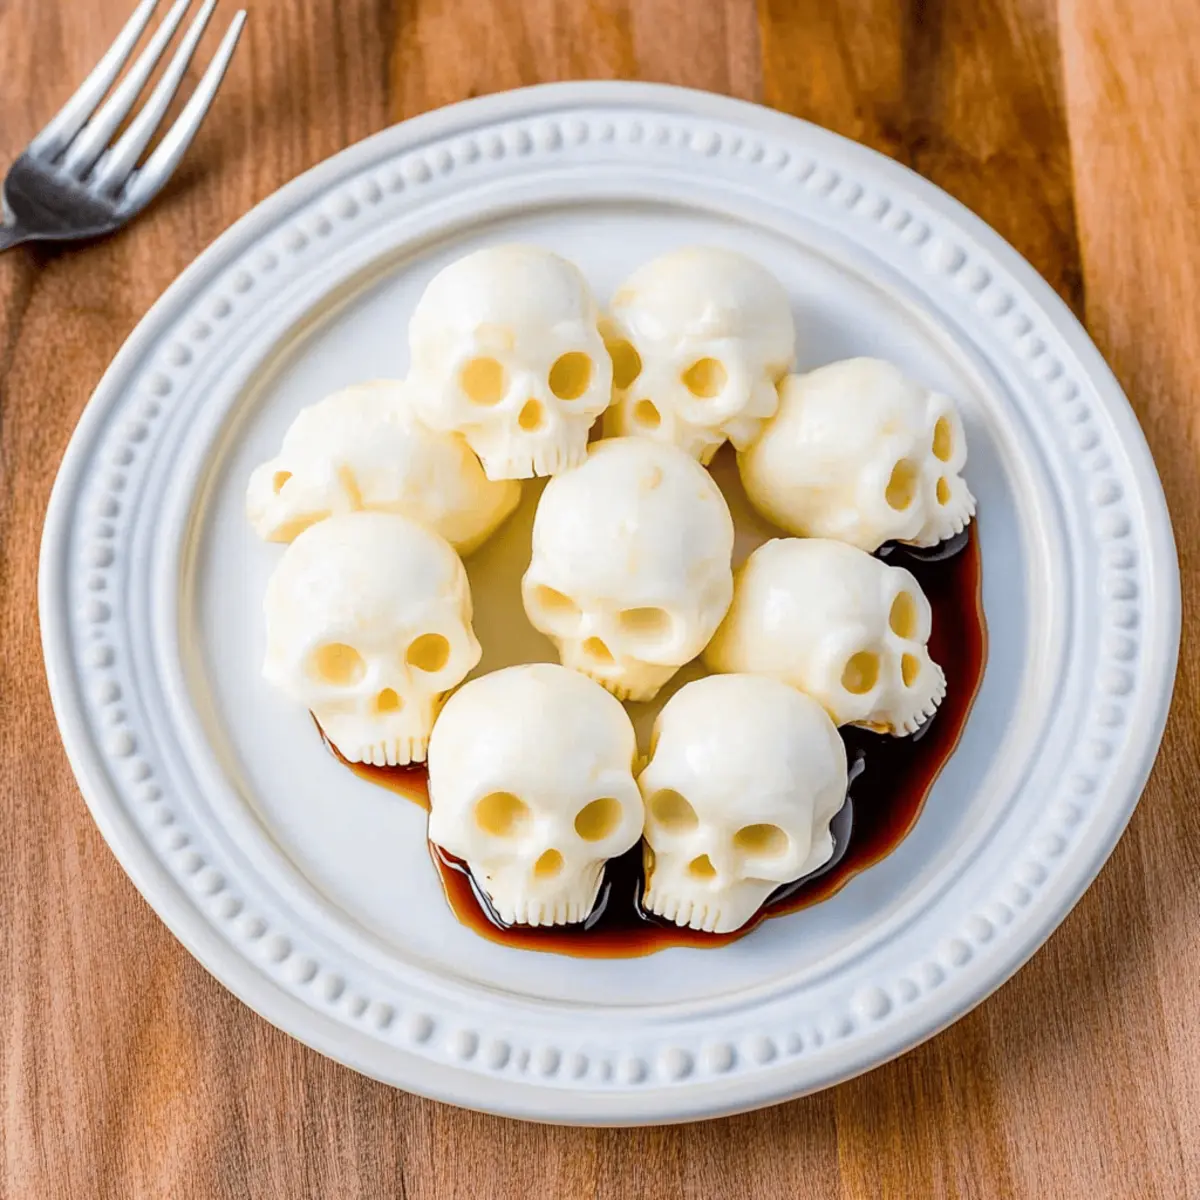
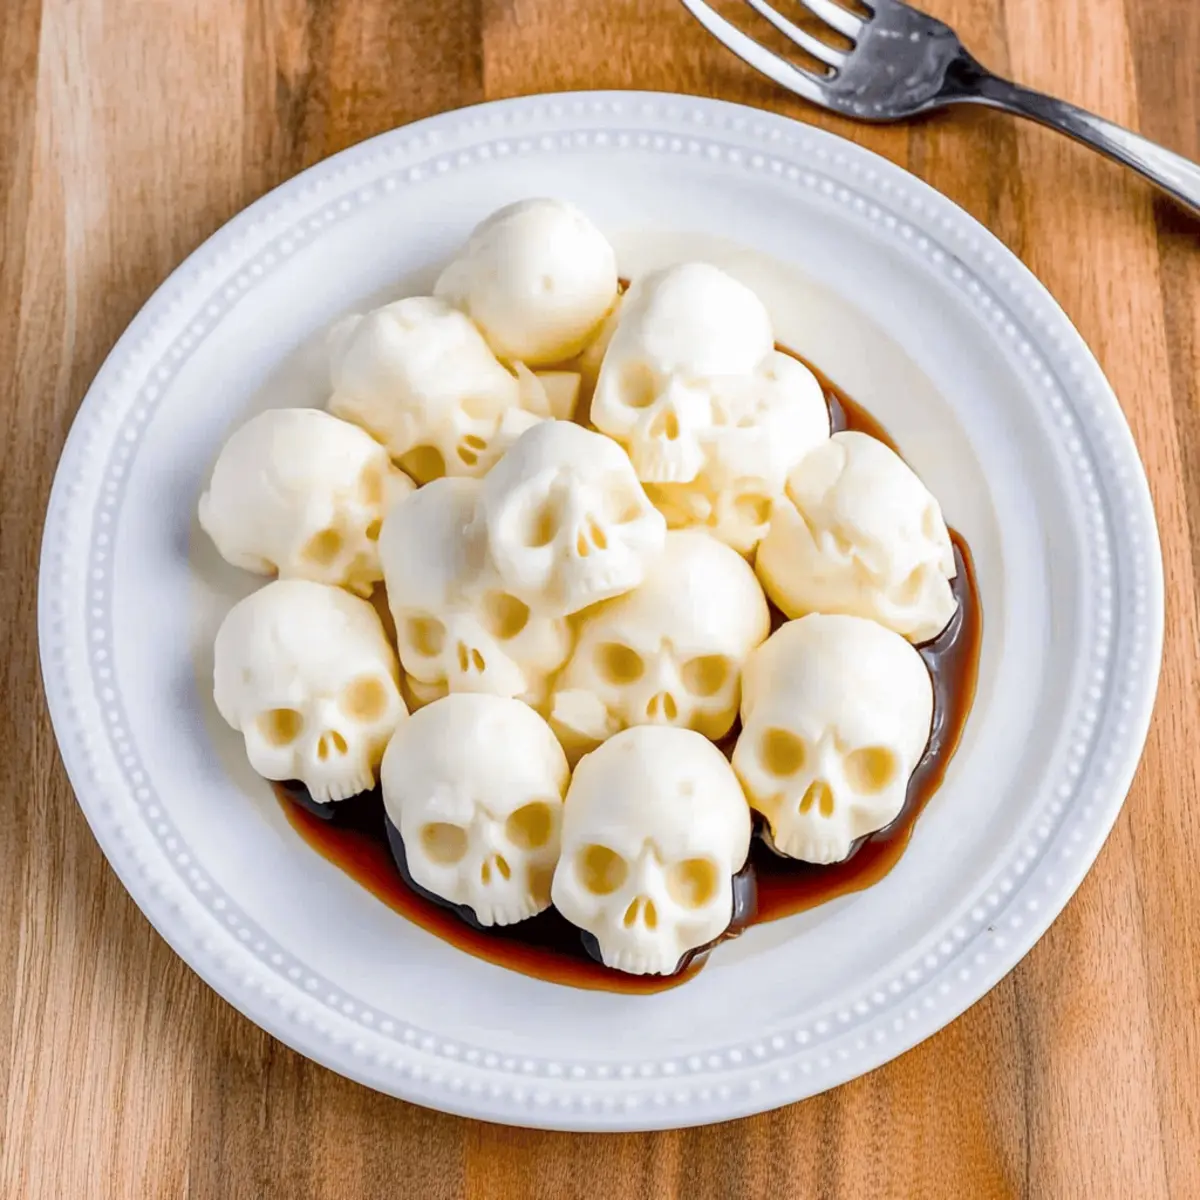
Versatile Selections: Pair these delicious skulls with a balsamic glaze for a gourmet taste, perfect for a centerpiece charcuterie board or as a delicious salad addition.
Make-Ahead Magic: Prepare the skulls a day in advance, so you can enjoy the festivities rather than stress in the kitchen. It’s hassle-free hosting at its finest!
Mozzarella Cheese Skulls Ingredients
• Get ready to create these spooky delights!
For the Cheese Skulls
- Mini Mozzarella Balls – These are the star of the show, providing creamy texture and rich flavor for your Mozzarella Cheese Skulls.
- Silicone Skull Mold – Essential for shaping your cheese into adorable skulls; choose one that’s heat-safe for perfect results.
Optional Dipping Sauce
- Balsamic Glaze – A gourmet touch to elevate your appetizer; it complements the creamy mozzarella beautifully.
Topping Options
- Fresh Herbs – Consider adding fresh basil or parsley on top for a pop of color and flavor balance.
- Seasoned Breadcrumbs – For an extra crunch, sprinkle seasoned breadcrumbs before baking to add delightful texture.
Step‑by‑Step Instructions for Mozzarella Cheese Skulls
Step 1: Preheat the Oven
Begin by preheating your oven to 350°F (175°C). This temperature is perfect for gently softening the mini mozzarella balls without overcooking them. Set a baking tray nearby to place your silicone skull mold once it’s ready, ensuring everything is within reach as you prepare.
Step 2: Prepare the Mozzarella
While the oven is heating, pat the mini mozzarella balls dry with a paper towel. This step is crucial to remove excess moisture that could hinder the shaping process. Aim for a perfectly dry exterior, which will help them hold their form as adorable mozzarella cheese skulls during baking.
Step 3: Fill the Mold
Next, carefully place each dried mozzarella ball into the silicone skull mold. Ensure they are nestled well in the mold’s cavities to achieve that delightful skull shape. It’s okay to crowd them slightly, as they will soften and spread a little while baking, but make sure they fit snuggly for the best visual effect.
Step 4: Bake the Cheese Balls
Once your mold is filled, transfer it to the preheated oven. Bake for 8-10 minutes, keeping an eye on them. You’ll know they’re ready when they become soft enough to mold but still hold their shape. The gentle warmth will heighten their cheesy aroma, making your kitchen smell delightful!
Step 5: Shape the Cheese Skulls
Remove the silicone mold from the oven and let it cool slightly. Using a spoon, gently press the softened mozzarella into the mold, ensuring that each detail of the skull is well defined. This is the fun part—feel free to be generous in scooping so each skull has a plump and spooky look!
Step 6: Chill to Set
After shaping, place the mold in the refrigerator for about 10 minutes. This cooling process helps the mozzarella skulls firm up and maintain their charming shape. As they chill, envision how wonderful they will look as a centerpiece for your Halloween gathering!
Step 7: Unmold the Cheese Skulls
Finally, carefully remove the mozzarella cheese skulls from the silicone mold. Take your time to gently peel the mold away, ensuring each skull comes out intact. With their unique shapes ready to dazzle your guests, they are perfect for displaying or serving alongside tasty dipping sauces like balsamic glaze.

What to Serve with Spooky Mozzarella Cheese Skulls
Elevate your Halloween spread with delightful accompaniments that will leave guests spellbound and satisfied.
-
Crispy Garlic Bread: The crunchy texture pairs perfectly with these soft cheese skulls, making each bite a delicious contrast.
-
Pumpkin Soup Shooters: Serve these creamy skulls alongside warm, savory pumpkin soup for a festive touch, combining flavors of the season.
-
Mixed Greens Salad: A fresh salad with zesty vinaigrette brings brightness to your plate and complements the richness of the skulls beautifully.
-
Charcuterie Board: Include an array of meats and cheeses alongside your mozzarella skulls, creating a festive, colorful display that’s visually inviting.
-
Mini Grape Skewers: The sweetness of grapes on a skewer offers a refreshing burst that balances the rich, cheesy flavor of the skulls.
-
Dracula’s Red Punch: A fruity, punchy beverage adds a playful twist, keeping guests hydrated while matching the spooky theme.
-
Dark Chocolate Mousse Cups: For dessert, a creamy chocolate mousse brings a decadent end to the meal, enticing your guests with its rich taste.
Experiment with these pairings to create a Halloween feast that’s both fun and satisfying!
Make Ahead Options
These spooky mozzarella cheese skulls are perfect for meal prep, allowing you to enjoy your Halloween festivities without last-minute stress! You can prepare the cheese skulls up to 24 hours in advance. Simply follow the recipe through the shaping step and refrigerate them in an airtight container after they chill and set. If you’d like, you can also freeze the unbaked cheese skulls for up to 3 months—just make sure they’re stored in a freezer-safe container. To maintain their delightful texture and shape, ensure the mozzarella is fully dried before molding. When ready to serve, simply bake them directly from the refrigerator or freezer, adding a few extra minutes to the baking time if frozen. With this make-ahead strategy, you can delight your guests with these cute mozzarella cheese skulls while savoring your time together!
Storage Tips for Mozzarella Cheese Skulls
Fridge: Store any leftovers in an airtight container in the refrigerator for up to 3 days to maintain their freshness and flavor.
Freezer: For longer storage, freeze the mozzarella cheese skulls in a single layer on a baking sheet before transferring to a freezer-safe container. They can last for up to 2 months.
Reheating: To enjoy frozen skulls, thaw in the fridge overnight and reheat gently in the oven at 350°F (175°C) until warmed through, about 10 minutes.
Make-Ahead: These delightful mozzarella cheese skulls can be made a day ahead, allowing for stress-free party planning while still serving a fun appetizer!
Expert Tips for Mozzarella Cheese Skulls
-
Drying Matters: Ensure mozzarella is thoroughly dried before baking to avoid excess moisture that might compromise the molding process.
-
Silicone Mold Selection: Choose a high-quality, oven-safe silicone mold to guarantee that it won’t warp during baking and your cheese skulls come out perfectly shaped.
-
Keep an Eye on Baking: Monitor the cheese closely while baking; removing it just as it becomes soft enough to mold will yield the best results for your Mozzarella Cheese Skulls.
-
Chilling Time: Don’t skip the chilling step! Allowing the mozzarella to cool and set enhances its shape and makes it easier to handle when unmolding.
-
Experiment with Shapes: Use various silicone molds to create different spooky figures; this keeps the appetizer spread exciting and showcases your creativity!
Mozzarella Cheese Skulls Variations
Feel free to get creative with your mozzarella cheese skulls and make them uniquely yours!
-
Flavored Cheeses: Swap mini mozzarella balls for herb-infused or sun-dried tomato cheese balls to add extra flavor that will tantalize your taste buds.
Imagine the delightful surprises your guests will experience with a simple twist like this! -
Other Shapes: Use different silicone molds featuring spooky designs like pumpkins or ghouls, adding depth to your Halloween spread for a playful touch.
Explore various shapes to keep your appetizers festive and exciting! -
Dairy-Free Option: Substitute the mini mozzarella balls with a plant-based cheese that melts well for a dairy-free version everyone will love.
This swap ensures everyone can enjoy these spooky treats without missing out. -
Spicy Kick: Mix in some chopped jalapeños or crushed red pepper flakes to your cheese balls before baking for a zesty twist that brings the heat!
This can take your spooky skulls from mild to wild, perfect for those who crave an extra punch. -
Herb Garnish: Top each skull with a sprinkle of fresh herbs like chives or dill for an appealing finish and some extra flavor.
Fresh herbs can brighten the presentation, making those cheese skulls pop on your table! -
Crunchy Topping: Coat your cheese skulls with panko breadcrumbs before baking. This will give them a delicious crunch and textured contrast to the creamy cheese.
This simple addition brings a delightful twist that enhances every bite! -
Rich Dipping Sauce: Elevate your serving with a spicy marinara or a sweet chili sauce as a dip, providing that perfect pairing for your spooky appetizers.
This little change can enhance your guests’ experience, leaving them craving more. -
Sweet Surprise: For a fun twist, drizzle a bit of honey or agave nectar over the skulls before serving; it creates a sweet contrast with the savory cheese.
Trying such a sweet twist turns a spooky treat into a delightful one, bursting with unexpected flavors!
Incorporate these variations into your next Halloween gathering, and your Mozzarella Cheese Skulls will charm all your guests! Plus, don’t forget to pair them with a gorgeous charcuterie board featuring treats like Strawberry Cheesecake Cinnabon or a slice of Chocolate Cheesecake Decadent.
Mozzarella Cheese Skulls Recipe FAQs
What type of mozzarella is best for this recipe?
Absolutely, mini mozzarella balls are the star of this recipe! They provide the creamy texture and rich flavor that makes the mozzarella cheese skulls delightful. Look for fresh mozzarella packed in water for the best results, or you can use mozzarella pearls which are perfectly sized for shaping.
How should I store leftover mozzarella cheese skulls?
You can easily store any leftovers in an airtight container in the refrigerator for up to 3 days. Just ensure they cool completely before sealing to preserve their texture and flavor. It’s a quick and simple way to keep your lovely skulls fresh for snacking later!
Can I freeze mozzarella cheese skulls? How?
Yes, you can freeze these cheesy delights! To do this, place the mozzarella skulls in a single layer on a baking sheet and freeze until solid. Once frozen, transfer them to a freezer-safe container or bag. They can be stored for up to 2 months. When you’re ready to enjoy them, simply thaw overnight in the fridge and reheat gently in an oven at 350°F (175°C) for about 10 minutes until warmed through.
What should I do if the mozzarella doesn’t hold its shape?
If your mozzarella skulls don’t hold their shape properly, it’s likely due to excess moisture. Be sure to pat the mini mozzarella balls dry thoroughly before placing them in the mold, as any leftover moisture can cause the cheese to spread out during baking. Additionally, keep an eye on the baking time; you want them just soft enough to mold without losing their structure.
Are these mozzarella cheese skulls suitable for everyone?
Very! Mozzarella cheese is generally safe for most people; however, if you have lactose intolerance, opt for lactose-free mozzarella instead. Always check for allergy concerns with guests, especially since these treats can include specific toppings or sauces. And remember, they make a fantastic vegetarian-friendly option at Halloween gatherings!
Delightful Mozzarella Cheese Skulls for Your Spooky Halloween Feast
Ingredients
Equipment
Method
- Preheat your oven to 350°F (175°C).
- Pat the mini mozzarella balls dry with a paper towel.
- Carefully place each dried mozzarella ball into the silicone skull mold.
- Transfer the mold to the oven and bake for 8-10 minutes.
- Remove the mold and gently press each mozzarella into shape.
- Chill in the refrigerator for about 10 minutes to set.
- Carefully remove the mozzarella skulls from the mold.
Leave a Reply