
As the smoky aroma wafts through the kitchen, my mouth waters in anticipation of the vibrant feast about to unfold. Today, I’m excited to share my go-to recipe for Peri Peri Chicken, a dish that doesn’t just satisfy hunger but ignites the senses with its fiery flavor. This Portuguese-style chicken is not only quick and easy to prepare, but also incredibly versatile—perfect for family dinners or lively gatherings. You can customize the spice level to cater to all palates, whether you’re a chili enthusiast or prefer something milder. With juicy, marinated chicken that’s just waiting to grill to perfection, this dish promises a culinary escape that your taste buds will thank you for. Ready to bring a taste of Portugal into your kitchen? Let’s dive into this scrumptious adventure together!

Why is Peri Peri Chicken a Must-Try?
Bold, Fiery Flavors: This recipe brings authentic Portuguese taste right to your home. The spicy marinade infuses the chicken with an irresistible zest that will have your taste buds dancing!
Customizable Heat: You can easily adjust the spice level to cater to everyone’s preferences—add more chili flakes for a kick, or tone it down for a milder, yet flavorful dish.
Quick and Easy: Perfect for busy weeknights or spontaneous gatherings, this recipe comes together in just a few simple steps, saving you precious time without sacrificing flavor.
Versatile Pairing Options: Enjoy with rice, couscous, or even tucked into a pita with fresh veggies! The serving suggestions offer endless possibilities to suit any occasion.
Instant Crowd-Pleaser: Impress guests with an easy yet captivating dish; this Peri Peri Chicken is sure to leave everyone raving! Don’t miss trying it alongside Garlic Parmesan Chicken for variety or a healthy twist like High Protein Chicken.
Peri Peri Chicken Ingredients
For the Marinade
- Whole Chicken – The star of this dish; opt for bone-in pieces for maximum flavor and juiciness.
- Olive Oil – Keeps the chicken moist; it can be swapped with avocado oil if you prefer.
- Garlic (4 cloves, minced) – Enhances flavor depth; fresh garlic is best for a fragrant marinade.
- Lemon Juice (2 lemons) – Balances the flavors with acidity; freshly squeezed juice is ideal.
- Paprika (2 tablespoons) – Adds sweetness and color; smoked paprika gives an even richer profile.
- Dried Oregano (1 tablespoon) – Provides a lovely herbal note; use fresh oregano for a bolder punch.
- Chili Flakes (1 tablespoon) – Brings the heat; adjust according to your preferred spice level for this Peri Peri Chicken.
- Salt and Pepper – Essential for seasoning; customize according to taste.
Optional Garnishes
- Fresh Herbs – Adds a burst of color and freshness; consider parsley or cilantro.
- Lemon Wedges – Provides that extra zing when served—perfect for those who love a zesty kick!
Step‑by‑Step Instructions for Peri Peri Chicken
Step 1: Prepare the Marinade
In a medium bowl, whisk together 1/4 cup of olive oil, 4 minced garlic cloves, the juice of 2 fresh lemons, 2 tablespoons of paprika, 1 tablespoon of dried oregano, 1 tablespoon of chili flakes, and a generous pinch of salt and pepper. This zesty marinade will bring your Peri Peri Chicken to life, blending vibrant flavors.
Step 2: Marinate the Chicken
Place your whole chicken or bone-in pieces into a resealable plastic bag or a large bowl. Pour the prepared marinade over the chicken, ensuring all pieces are well-coated. Seal the bag or cover the bowl with plastic wrap. Allow the chicken to marinate in the refrigerator for at least 2 hours, preferably overnight, for the best flavor infusion.
Step 3: Preheat the Grill or Oven
When you’re ready to cook, preheat your grill or oven to a medium-high heat of around 400°F (200°C). Allow time for the heat to build up, which will ensure that your Peri Peri Chicken gets that perfect char and cooking balance.
Step 4: Cook the Chicken
Remove the chicken from the marinade, letting excess marinade drip off. Place the chicken on the grill grates or a roasting pan. Grill or roast the chicken for about 25–30 minutes, turning occasionally, until it reaches a golden-brown color and an internal temperature of 165°F (75°C).
Step 5: Rest and Serve
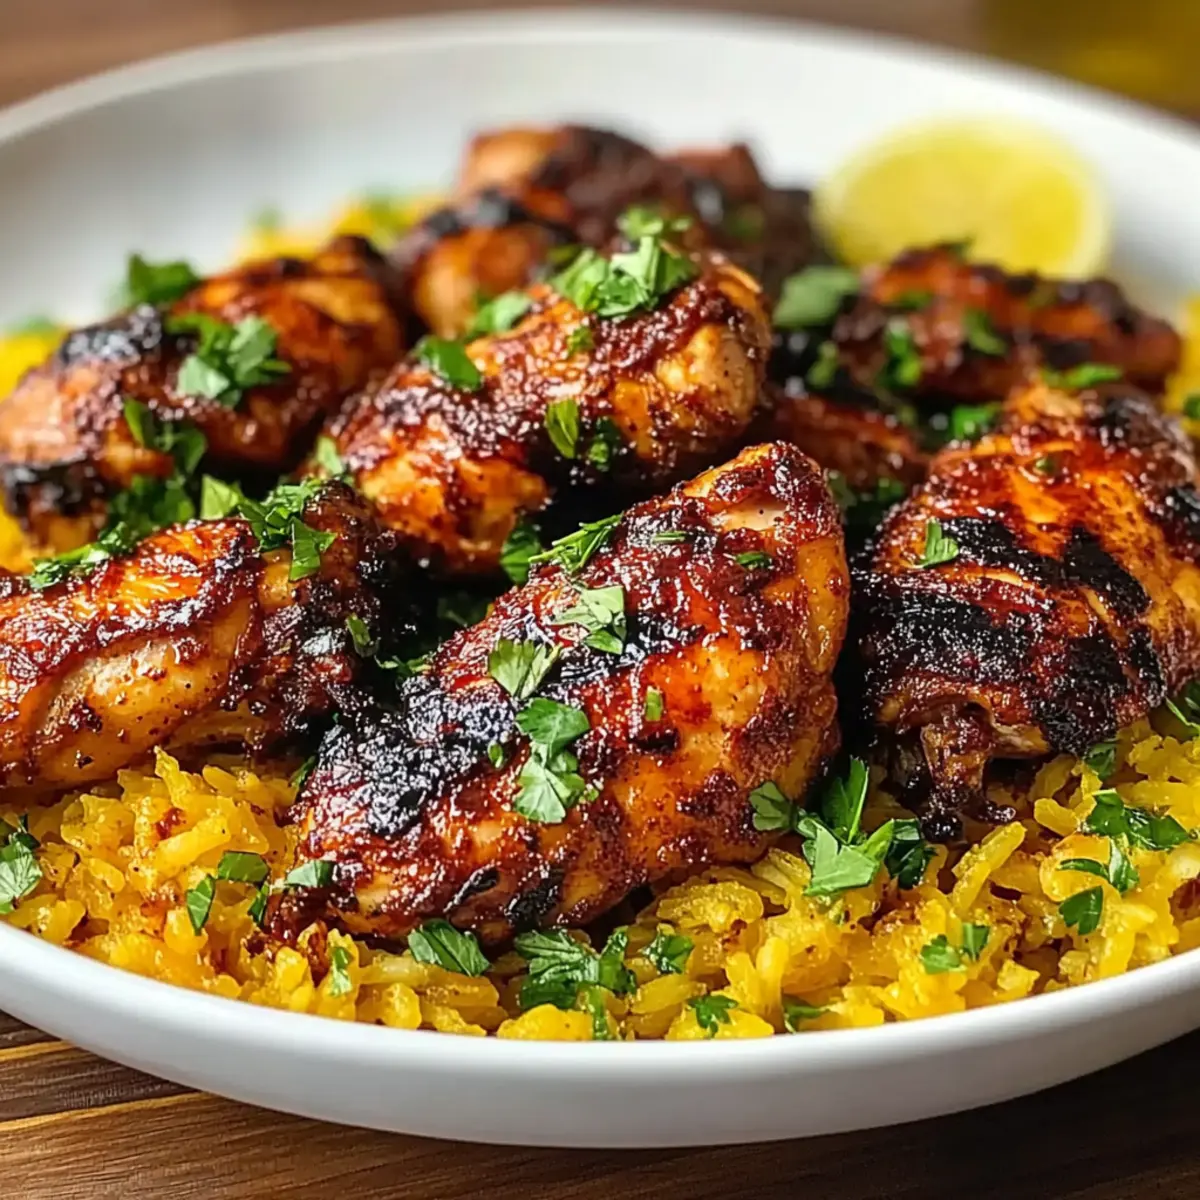
Once cooked, remove the Peri Peri Chicken from heat and let it rest for 5–10 minutes. This helps retain the juices. Serve it hot, garnished with fresh herbs and lemon wedges, alongside grilled vegetables or a refreshing side salad for a delightful family meal.
Peri Peri Chicken Variations & Substitutions
Feel free to mix things up! Your Peri Peri Chicken can be easily tailored to fit different dietary needs and flavor preferences.
- Vegetarian Option: Replace chicken with tofu or cauliflower for a delicious plant-based twist. This way, you can still enjoy the vibrant marinade!
- Herb Swap: Experiment with fresh herbs like thyme or rosemary instead of oregano for a new flavor dimension. Fresh herbs can elevate the dish beautifully!
- Extra Heat: Add more chili flakes or a dash of your favorite hot sauce to the marinade for those who crave a fiery kick. Your taste buds will thank you for the added zesty surprise!
- Spice Blend: Incorporate smoked paprika or a sprinkle of cumin into the marinade to explore different flavor profiles. This addition will give your chicken an irresistible depth of flavor.
- Citrus Boost: Swap lemon juice for lime or add orange juice for a delightful twist that brightens the dish even more. This can create a refreshing tang!
- Grill vs. Bake: Try cooking the chicken in the oven with a lined baking sheet if you don’t have a grill—it’s just as delicious! Baking allows for a caramelized exterior while keeping the inside tender.
- Add Veggies: Toss in some vegetables like bell peppers or zucchini in the marinade and grill alongside the chicken for a complete, colorful meal. They will soak up the spicy goodness!
- Salsa Pairing: Top your cooked chicken with a fresh salsa or avocado for a creamy accompaniment that soothes the spice. This pairing adds a refreshing contrast to the heat!
For variety, consider serving your Peri Peri Chicken with a vibrant Garlic Parmesan Chicken or a healthy option like High Protein Chicken. Your options are endless!
How to Store and Freeze Peri Peri Chicken
Fridge: Store leftover Peri Peri Chicken in an airtight container for up to 3 days. Ensure it’s completely cooled before sealing to maintain freshness.
Freezer: For longer storage, freeze the marinated chicken in a heavy-duty freezer bag for up to 3 months. This makes meal prep a breeze!
Reheating: When ready to enjoy, thaw overnight in the fridge, then reheat in the oven or grill until heated thoroughly and deliciously juicy once again.
Air-tight Recommendations: For best results, wrap leftovers tightly in plastic wrap before placing them in the container or bag to prevent freezer burn.
What to Serve with Spicy Peri Peri Chicken
Elevate your Peri Peri Chicken experience by pairing it with delightful side dishes that balance flavors and textures.
-
Creamy Mashed Potatoes: The buttery richness of mashed potatoes provides a comforting contrast to the fiery chicken, creating a well-rounded meal.
-
Crispy Grilled Vegetables: Seasonal vegetables like zucchini, bell peppers, and asparagus enhance the dish with fresh, vibrant flavors while adding needed crunch. A drizzle of olive oil and a sprinkle of salt is all you need to let them shine.
-
Lemon Herb Couscous: Fluffy couscous infused with herbs and lemon zest complements the zestiness of the chicken, bringing a light and fluffy texture to the plate.
-
Chickpea Salad: A refreshing chickpea salad with cherry tomatoes, cucumber, and a zesty dressing adds a vibrant crunch that beautifully offsets the spice. The protein content here also makes it a filling option.
-
Tzatziki Sauce: This cool, creamy yogurt sauce is perfect for soothing the heat from the chicken, elevating each bite with its refreshing hint of cucumber and dill.
-
Grilled Corn on the Cob: Sweet, smoky corn on the cob adds a touch of summer to your meal, with its charred kernels providing a delightful sweetness that contrasts wonderfully with the spicy chicken.
-
Sparkling Lemonade: A refreshing drink like sparkling lemonade not only quenches thirst but its citrusy brightness harmonizes tastefully with the flavors in your dish.
-
Chocolate Mousse: For dessert, consider a rich chocolate mousse to round out the meal; its creamy texture and sweet indulgence contrast beautifully with the meal’s zest and spice.
Expert Tips for Peri Peri Chicken
-
Flavor Boosting: For maximum flavor, pierce the chicken pieces with a fork before marinating; this helps the marinade penetrate deeper.
-
Basting Magic: Baste the chicken with leftover marinade while it cooks to keep it juicy and enhance the delightful taste of your Peri Peri Chicken.
-
Resting Rule: After cooking, let the chicken rest for 5–10 minutes. This allows the juices to redistribute, keeping the meat succulent.
-
Perfect Cooking: Use a meat thermometer to ensure the chicken reaches an internal temperature of 165°F (75°C) for safe and delicious results.
-
Spice Control: Adjust the amount of chili flakes to suit your taste. More flakes mean an extra kick, so be mindful of everyone’s spice preferences!
Make Ahead Options
These Peri Peri Chicken preparations are a lifesaver for busy weeknights! You can marinate the chicken up to 24 hours in advance, allowing the flavors to deeply penetrate the meat. Just place the chicken in a resealable bag with the marinade as detailed in the recipe, then refrigerate it. If you’re short on time, you can even marinate it for just 2 hours. When you’re ready to cook, simply preheat your grill or oven and proceed with grilling or roasting until it reaches an internal temperature of 165°F (75°C). This way, you’ll enjoy succulent, fiery Peri Peri Chicken that’s just as delicious and has saved you precious time in the kitchen!

Peri Peri Chicken Recipe FAQs
What kind of chicken should I use for Peri Peri Chicken?
You can use a whole chicken or bone-in pieces for maximum flavor and juiciness. Bone-in pieces like thighs and drumsticks are ideal since they stay moist during cooking.
How should I store leftover Peri Peri Chicken?
Absolutely! Store leftover Peri Peri Chicken in an airtight container in the refrigerator for up to 3 days. Make sure it’s completely cooled before sealing to keep it fresh and tasty.
Can I freeze Peri Peri Chicken?
Very! You can freeze the marinated chicken in a heavy-duty freezer bag for up to 3 months. Just be sure to remove as much air as possible to prevent freezer burn. Thaw it overnight in the fridge before cooking.
What if my Peri Peri Chicken turns out dry?
The key to juicy chicken is not overcooking it. If you accidentally overcook, try basting with extra marinade or a bit of chicken broth. Always check the internal temperature; it should reach 165°F (75°C).
Can I use this recipe for other proteins?
Definitely! You can substitute chicken with tofu, cauliflower, or even shrimp for a delightful twist! Adjust cooking times accordingly, especially for shrimp, which cooks much faster.
Is Peri Peri Chicken safe for pets?
While the chicken itself is fine, avoid sharing with pets if it’s seasoned with garlic, onion, or high salt, as these can be harmful. Always serve plain, cooked meat if you want to treat your furry friends!

Fiery Peri Peri Chicken: Easy, Flavorful Family Delight
Ingredients
Equipment
Method
- Prepare the marinade by whisking together olive oil, minced garlic, lemon juice, paprika, oregano, chili flakes, salt, and pepper in a medium bowl.
- Marinate the chicken by placing it in a resealable bag or bowl with the marinade, ensuring it's well-coated. Refrigerate for at least 2 hours or overnight.
- Preheat the grill or oven to medium-high heat at around 400°F (200°C).
- Cook the marinated chicken on the grill or in a roasting pan for about 25–30 minutes until golden-brown and reaches an internal temperature of 165°F (75°C).
- Let the chicken rest for 5–10 minutes before serving, garnished with fresh herbs and lemon wedges.
Leave a Reply