
As I stood in my kitchen, the sweet aroma of melting sugar danced through the air, instantly transporting me to my favorite local ice cream shop. There’s something magical about crafting your own salted caramel ice cream—it’s a luscious treat that turns any ordinary day into a celebration. With just a few real ingredients and the help of a Ninja Creami, you’ll create a silky, smooth dessert that rivals anything you’d find at a high-end parlor. The best part? This gluten-free delight is not only a recipe that you can whip up quickly, but it also promises to impress friends and family alike. Curious how to bring this indulgent flavor into your home without a scoop shop? Let’s dive into the creamy goodness together!

Why is Salted Caramel Ice Cream Awesome?
Irresistible Flavor: The blend of deeply caramelized sugar and sea salt creates a uniquely rich taste that will leave your taste buds craving more.
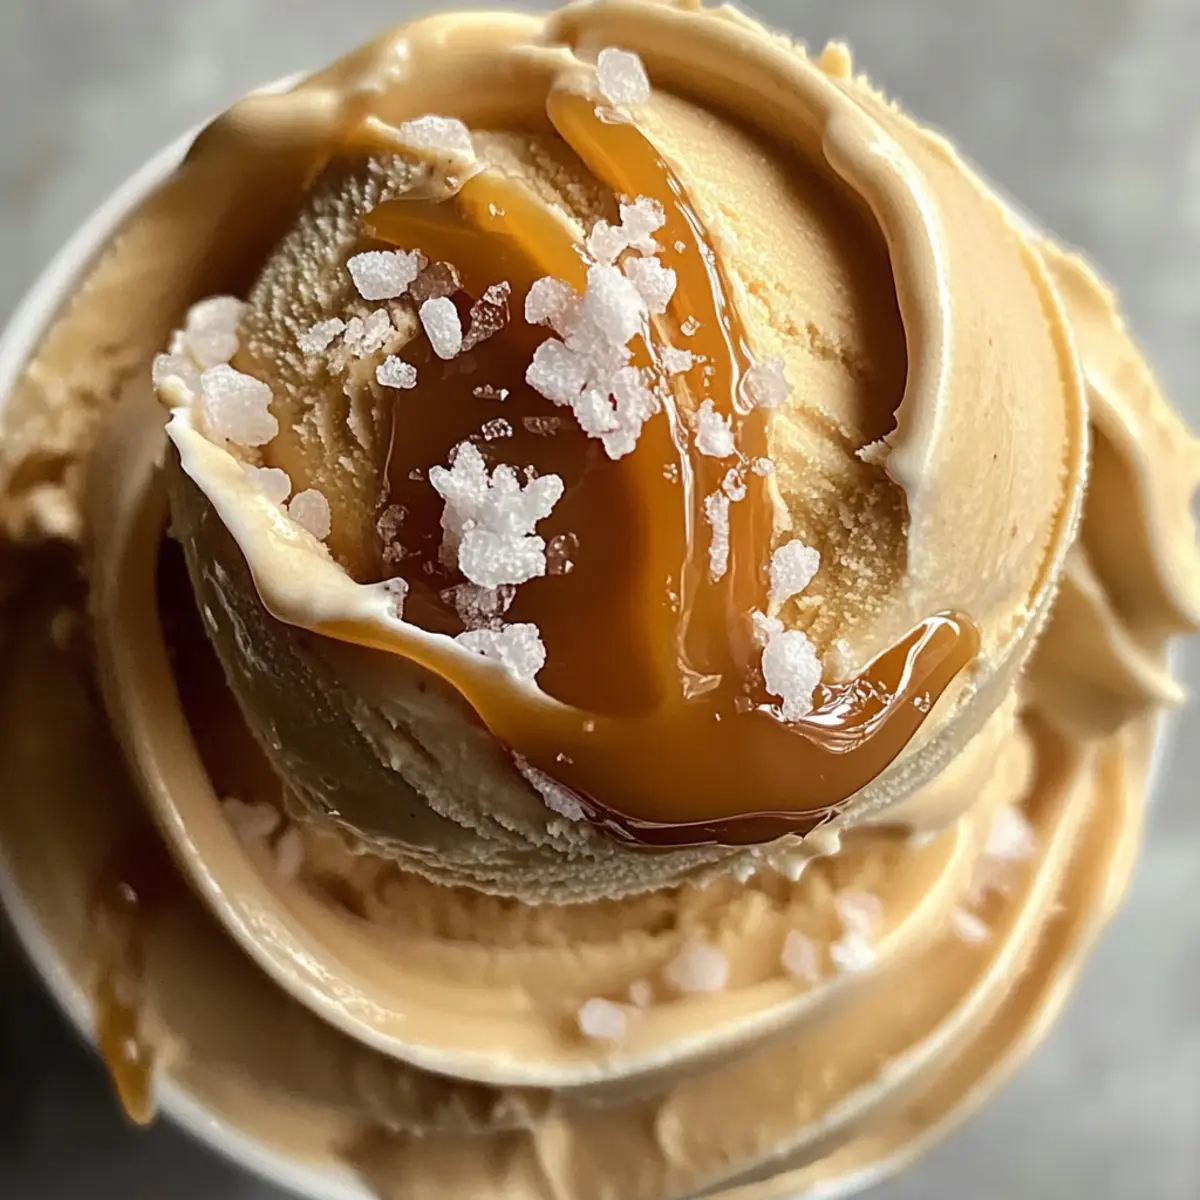
Luxuriously Creamy: With its velvety texture, this salted caramel ice cream feels like a decadent treat you’d expect at a fancy restaurant but can easily enjoy at home.
Unmatched Simplicity: Using just a few real ingredients, the Ninja Creami simplifies the process, making it perfect for both novice and experienced chefs.
Gluten-Free Delight: This dessert caters to gluten-free diets, ensuring everyone can indulge in its delightful sweetness.
Crowd-Pleasing Appeal: Ideal for gatherings or cozy nights in, this homemade ice cream is guaranteed to impress your guests or bring a smile to your loved ones’ faces. Plus, it’s the perfect companion to warm desserts like a slice of deliciously rich caramel brownie cheesecake.
Salted Caramel Ice Cream Ingredients
For the Ice Cream Base
• Heavy Cream – Adds richness and creaminess to the ice cream base.
• Whole Milk – Contributes to a lighter texture while enhancing creaminess.
• Granulated Sugar – Provides sweetness and aids in caramelization.
• Egg Yolks – Enrich the custard base, giving it body and a luxurious mouthfeel.
• Unsalted Butter – Adds smoothness to the caramel; unsalted allows you to control salt content.
• Vanilla Extract – Enhances flavor complexity with aromatic notes.
For the Caramel
• Light Corn Syrup – Prevents crystal formation in the caramel, ensuring a smooth consistency.
• Sea Salt Flakes – Balances sweetness, adds a delightful crunch, and enhances the overall flavor of the salted caramel ice cream.
Step‑by‑Step Instructions for Salted Caramel Ice Cream
Step 1: Prepare Caramel
In a heavy-bottomed saucepan, combine granulated sugar and light corn syrup. Cook over medium heat, stirring gently, until the mixture turns a deep amber color, roughly 8 to 10 minutes. Once the desired color is achieved, remove it from heat and whisk in unsalted butter until the caramel is smooth and glossy. Allow it to cool slightly before swirling into your ice cream.
Step 2: Make Custard Base
In a saucepan, heat heavy cream and whole milk over medium until it barely simmers, about 5 minutes. Meanwhile, whisk egg yolks and remaining sugar in a bowl until pale and frothy. Gradually add the hot cream mixture to the yolks, whisking constantly to prevent curdling. Once combined, return this mixture back to the saucepan.
Step 3: Cook Custard
Continuing on low heat, stir the custard mixture constantly with a wooden spoon. Cook until it thickens enough to coat the back of the spoon, achieving a temperature of about 170°F, which should take around 5 to 7 minutes. Once ready, strain the custard through a fine-mesh sieve to remove any lumps and stir in vanilla extract. Let it cool completely.
Step 4: Combine and Freeze
Once the custard base has cooled, gently swirl your prepared salted caramel into it, ensuring an even distribution. Pour this delicious mixture into the Ninja Creami pint container. Seal it well and place it in the freezer for at least 24 hours, allowing it to firm up to a solid consistency essential for your salted caramel ice cream.
Step 5: Process Ice Cream
After the chilling period, remove the pint container from the freezer. Process the mixture on the “Ice Cream” setting of the Ninja Creami, which should take about a minute or so. For a smoother texture, select the “Re-spin” function and process until you reach your desired creaminess. Serve your salted caramel ice cream topped with a sprinkle of flaky sea salt for that perfect finishing touch.

Make Ahead Options
These luxurious salted caramel ice cream delights are perfect for busy weeknights and meal prep! You can prepare the caramel and custard base up to 3 days in advance—just store each component separately in airtight containers to maintain freshness and prevent the caramel from hardening. Once chilled, gently swirl the cooled caramel into the custard right before freezing it in the Ninja Creami. When you’re ready to serve, simply process the mixture on the “Ice Cream” setting, and enjoy your homemade salted caramel ice cream that tastes just as delicious as if it were freshly made!
Salted Caramel Ice Cream Variations
Treat your taste buds to some delightful twists on the classic recipe!
-
Dairy-Free: Use coconut milk and coconut cream instead of dairy for a vegan version. The tropical hint adds a beautiful flavor.
-
Nutty Twist: Incorporate crushed pistachios or walnuts into your ice cream base for added crunch and nutty undertones. The contrast of creamy texture and nutty flavor plays harmoniously with caramel.
-
Chocolate Lovers: Add a swirl of chocolate fudge or mix in cocoa powder into the custard for a chocolate caramel fusion. Think of a rich dessert that’s wonderfully decadent with each tempting bite.
-
Spicy Kick: Introduce a pinch of cayenne pepper or cinnamon into the caramel for a subtle heat that elevates the flavor profile. The unexpected warmth enhances the sweetness, resulting in a unique and adventurous dessert.
-
Coffee Infusion: Mix in a shot of espresso or coffee extract to the custard base before freezing. The coffee notes beautifully complement the buttery caramel, making it a sophisticated treat perfect for adults.
-
Seasonal Flavors: Embrace the seasons by adding pumpkin spice in the fall or peppermint extract during winter holidays to give the ice cream a festive flare. Each spoonful becomes a celebration of seasonal flavors.
-
Saucy Add-Ins: Swirl in homemade avocado cream sauce before freezing for a creamy, smooth texture with a touch of unique flavor. It adds an unexpected twist that everyone will love!
-
Topping Fusion: Try serving your salted caramel ice cream with a drizzle of fiery chicken ramen with creamy garlic sauce for a savory bite in between spoonfuls of sweet delight—it’s surprisingly satisfying!
Expert Tips for Salted Caramel Ice Cream
-
Perfect Caramel Color: Ensure your caramel reaches a deep amber hue to maximize flavor. Don’t rush this step; patience leads to the best salted caramel ice cream.
-
Custard Consistency: Stir the custard mixture constantly until it coats the back of a spoon, a crucial step for achieving the right thickness without overcooking.
-
Salt Selection: Use flaky sea salt instead of table salt to enhance texture and flavor; table salt can dissolve too much, losing that delightful crunch.
-
Grainy Caramel Fix: If your caramel turns grainy, add a tablespoon of hot water and whisk it well to smooth it out; it’s a quick remedy that helps keep your ice cream silky.
-
Cooling Time Matters: Allow your custard to cool completely before freezing; this helps maintain a creamy texture in the final product of your salted caramel ice cream.
What to Serve with Luxurious Salted Caramel Ice Cream?
Imagine enjoying a delightful scoop of creamy richness alongside treats that elevate the entire dessert experience.
-
Warm Brownies: Rich, fudgy brownies create a wonderful contrast to the coolness of ice cream, providing a delightful mix of textures.
-
Fresh Berries: Juicy strawberries, raspberries, or blueberries offer a refreshing tartness that cuts through the sweetness, balancing every bite.
-
Chocolate Chip Cookies: These classic cookies add a delightful crunch and a touch of nostalgia, perfect for dunking into your bowl of salted caramel ice cream.
-
Nutty Pecan Pie: A slice of this sweet pie adds a warm, spiced flavor, while its nutty notes beautifully complement the caramel ice cream.
-
Espresso: The bold flavor of a rich espresso contrasts with the ice cream’s sweetness, creating an invigorating and delightful combination that coffee lovers will adore.
-
Caramel Sauce Drizzle: A drizzle of warm caramel sauce on top enhances the luscious flavors already in the ice cream, creating an indulgent treat that’s hard to resist.
Enjoying your salted caramel ice cream with these pairings not only intensifies the dessert experience but also invites friends and family to indulge in a moment of bliss.
How to Store and Freeze Salted Caramel Ice Cream
Fridge: Store your salted caramel ice cream in a sealed container for up to 3 days, although it’s best enjoyed fresh for optimal texture and flavor.
Freezer: Keep the ice cream in an airtight container for up to 2 weeks. To prevent ice crystals from forming, press a piece of parchment paper against the surface before sealing.
Reheating: If the ice cream becomes too hard after freezing, let it sit at room temperature for about 10 minutes before scooping. This will restore its creamy texture.
Serving Tip: For the best experience, always serve your salted caramel ice cream with a sprinkle of flaky sea salt on top to accentuate its luxurious flavor.

Salted Caramel Ice Cream Recipe FAQs
What type of cream should I use for the best flavor?
Absolutely! I recommend using heavy cream to add richness and creaminess to your salted caramel ice cream. It gives that luxurious mouthfeel, perfect for a dessert this decadent.
How long can I store homemade salted caramel ice cream?
You can keep your salted caramel ice cream in an airtight container in the freezer for up to 2 weeks. To maintain the best texture, press a piece of parchment paper against the surface before sealing. This helps prevent ice crystals from forming.
Can I freeze leftover salted caramel ice cream?
Yes! If you have any leftovers, simply place it in an airtight container and freeze. It’s good for up to 2 weeks. However, if it becomes too hard, let it sit at room temperature for about 10 minutes before scooping to restore that creamy texture.
What should I do if my caramel turns grainy?
If your caramel becomes grainy, don’t worry! Just add a tablespoon of hot water and whisk well until it becomes smooth again. This quick fix will help keep your caramel silky, ensuring your salted caramel ice cream maintains that luxurious feel.
Is this recipe gluten-free?
Yes! This salted caramel ice cream is gluten-free, making it perfect for those with gluten sensitivities or dietary restrictions. Enjoy knowing everyone can indulge in this delightful treat without worry!
How can I ensure my custard base has the right consistency?
For a perfect custard base, stir it constantly over low heat until it coats the back of a spoon, reaching about 170°F. This will take approximately 5 to 7 minutes, so keep a close eye to avoid overcooking. A well-prepared custard will provide the ideal texture for your salted caramel ice cream.
Irresistibly Creamy Salted Caramel Ice Cream Recipe
Ingredients
Equipment
Method
- In a heavy-bottomed saucepan, combine granulated sugar and light corn syrup. Cook over medium heat, stirring gently, until the mixture turns a deep amber color, roughly 8 to 10 minutes. Remove from heat and whisk in unsalted butter until smooth. Allow it to cool slightly before swirling into the ice cream.
- Heat heavy cream and whole milk in a saucepan over medium until barely simmering, about 5 minutes. Meanwhile, whisk egg yolks and remaining sugar in a bowl until pale and frothy. Gradually add the hot cream mixture to the yolks, whisking to prevent curdling. Return the mixture to the saucepan.
- Stir the custard mixture constantly over low heat until it thickens enough to coat the back of the spoon, achieving about 170°F, roughly 5 to 7 minutes. Strain through a fine-mesh sieve to remove lumps and stir in vanilla extract. Let it cool completely.
- Gently swirl the prepared salted caramel into the cooled custard. Pour into the Ninja Creami pint container, seal well, and freeze for at least 24 hours to firm up.
- After freezing, remove the pint container and process on the 'Ice Cream' setting of the Ninja Creami for about a minute. Use 'Re-spin' for a smoother texture. Serve topped with flaky sea salt.
Leave a Reply