
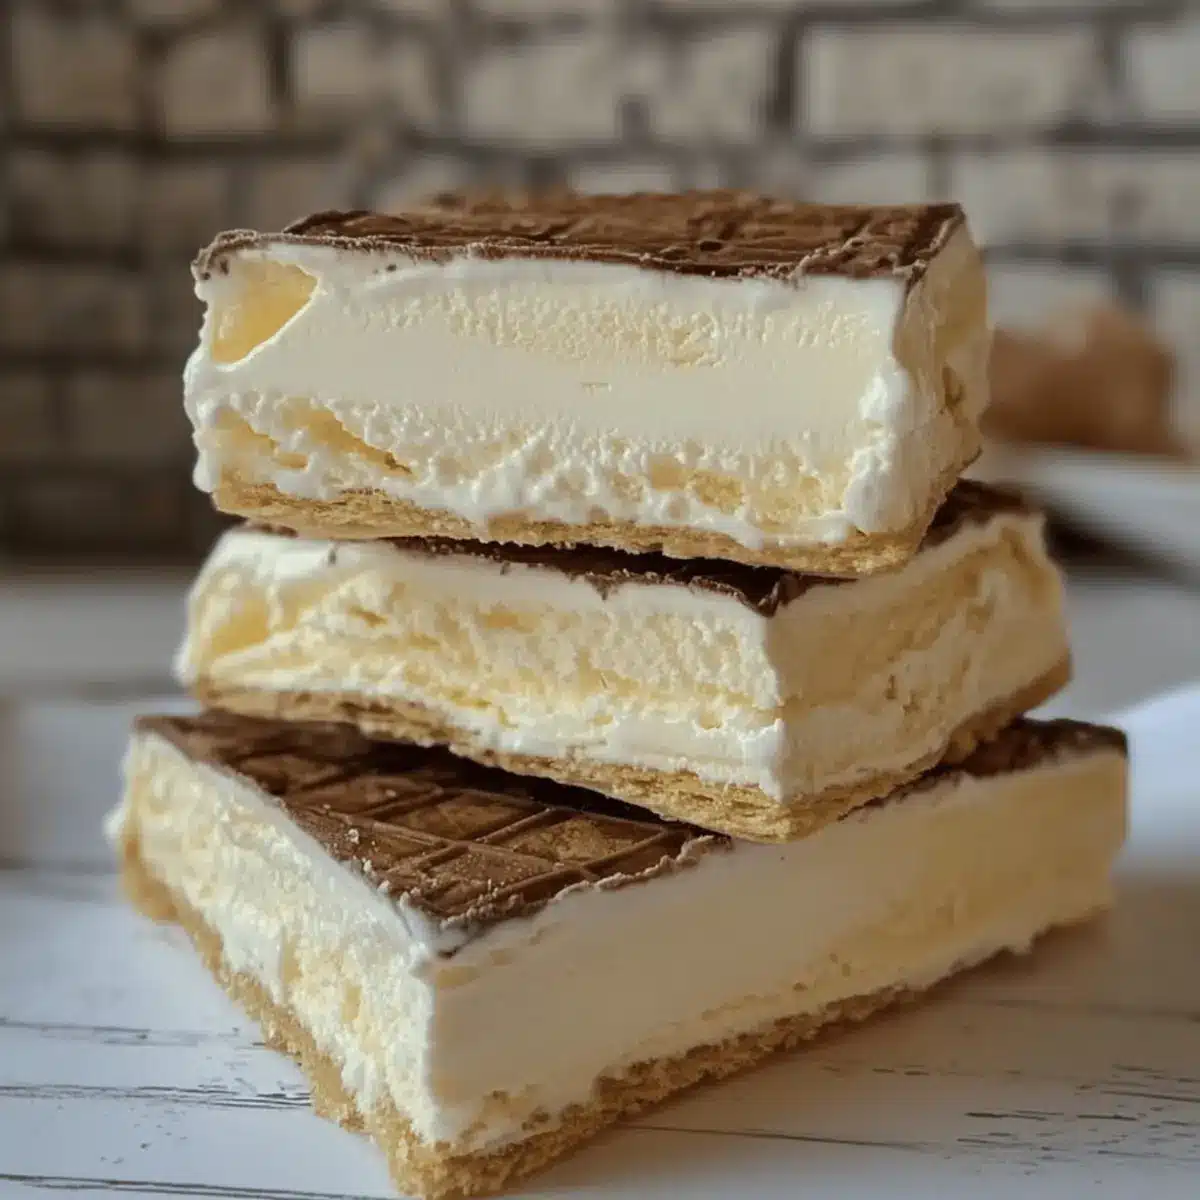
The sun is shining, and the air is filled with laughter—what better way to embrace summer than with a refreshing homemade treat? My recipe for 3-Ingredient Sandwich Ice Cream is the perfect antidote to hot days and busy schedules. With just three simple ingredients, this no-bake dessert creates luscious ice cream snugly nested between crispy waffle sheets, making it an instant crowd-pleaser at any outdoor gathering. Whether you lean towards classic cream, crave caramel, or have a sweet tooth for chocolate, there’s a flavor for every palate. Plus, since these delightful sandwiches are freezer-friendly, they’re an ideal make-ahead option that guarantees smiles whenever you’re ready to serve. Curious how to whip up this joyful summer staple? Let’s dive in!
Why is Sandwich Ice Cream a Must-Try?
Simplicity at its finest: With just three easy ingredients, you can whip up this delightful treat, making it perfect for novice cooks and busy chefs alike.
Versatile Flavors: Choose between classic cream, rich caramel, or indulgent chocolate to cater to everyone’s taste buds, ensuring there’s a favorite for every guest.
No-Bake Fun: Enjoy the quick and easy process—no oven required! Just mix, layer, and freeze for a delightful summer dessert.
Crowd-Pleaser: These vibrant sandwiches are guaranteed to be a hit at backyard barbecues or family gatherings, drawing smiles from children and adults alike.
Make-Ahead Magic: Ideal for those busy weeks, prepare a batch in advance and store in the freezer. They’ll be ready whenever the sweet cravings hit!
Sandwich Ice Cream Ingredients
• Whip up delightful ice cream sandwiches with these three essential ingredients!
For the Ice Cream
- Sahne (Heavy Cream) – Provides a rich, creamy texture crucial for your sandwich ice cream; ensure it’s cold before whipping for best results.
- Gezuckerte Kondensmilch (Sweetened Condensed Milk) – Adds sweetness and creaminess to the base; adjust the amount based on your desired level of sweetness.
For the Waffle Sheets
- Waffelblätter (Waffle Sheets) – Forms the delightful outer layer, providing just the right texture; easily found at Russian stores or large supermarkets.
For the Chocolate Variation
- Kakaopulver (Cocoa Powder) – Enhances your ice cream with a chocolatey twist; optional, but using high-quality cocoa will elevate the flavor.
Step‑by‑Step Instructions for sandwich ice cream
Step 1: Prepare the Form
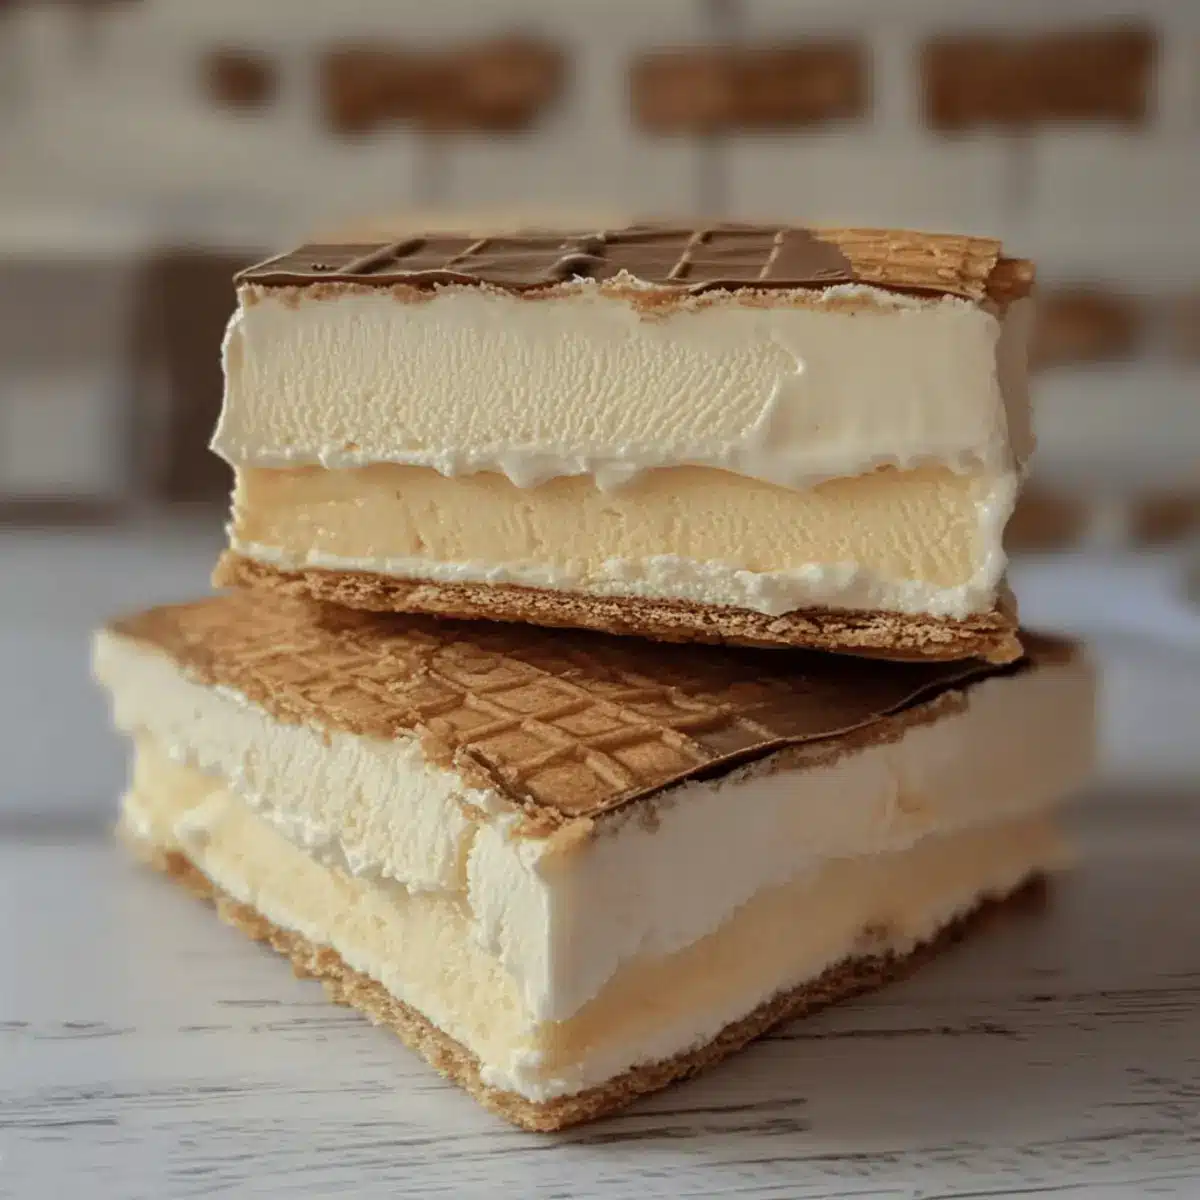
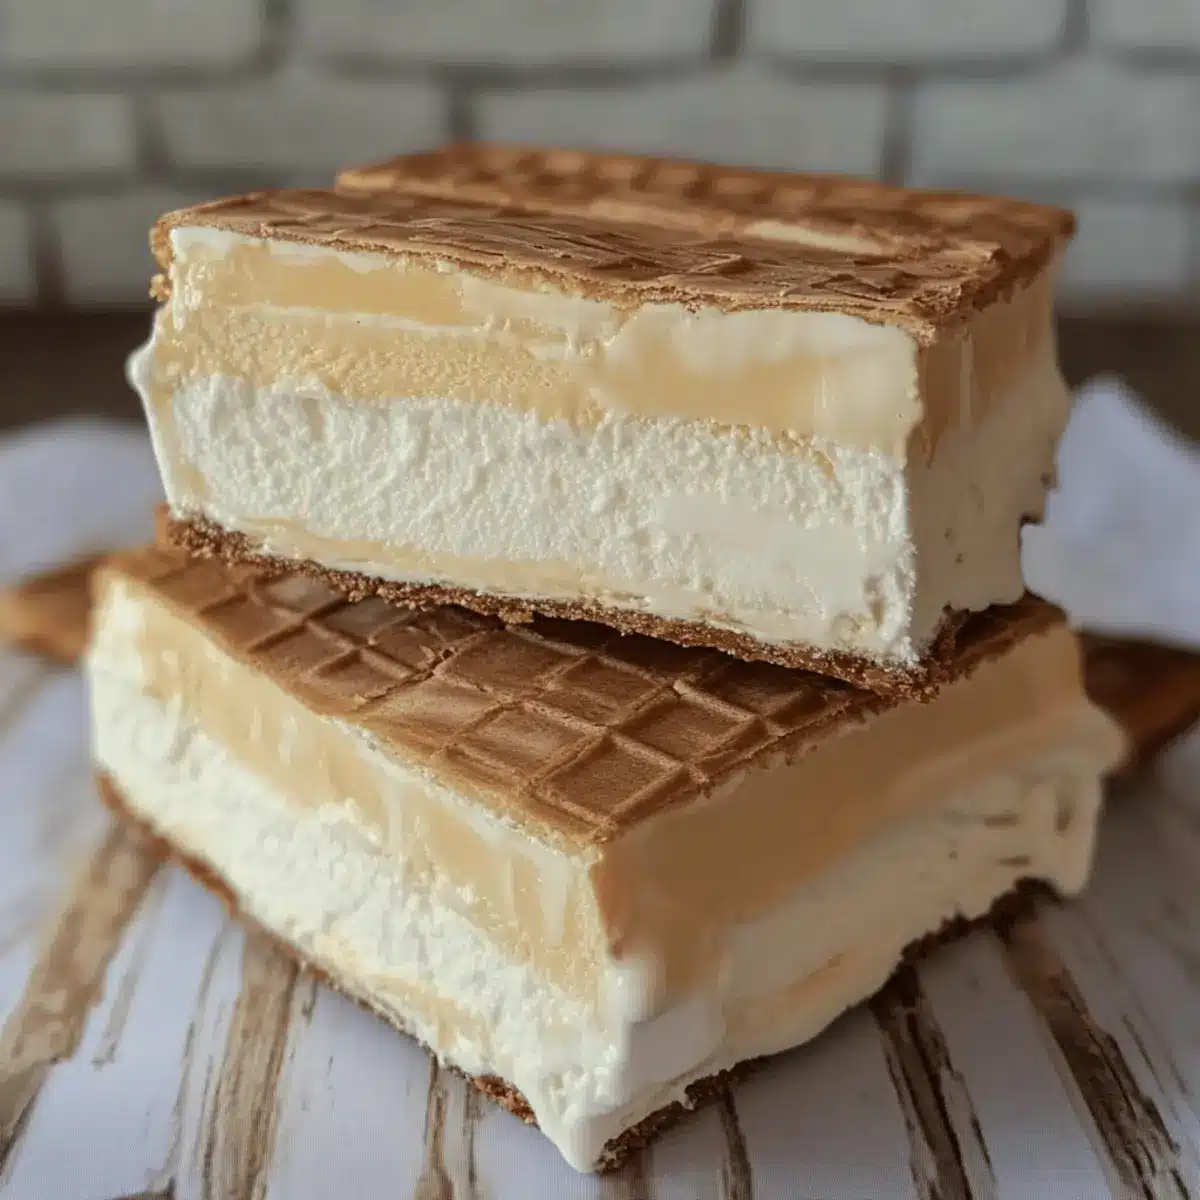
Start by lining a rectangular baking dish with parchment paper to prevent sticking. Place one waffle sheet at the bottom, ensuring it fits snugly within the dish. This base layer will hold your luscious ice cream sandwich together, setting the stage for a delightful treat.
Step 2: Make the Ice Cream Base
In a mixing bowl, combine cold heavy cream and sweetened condensed milk. Using a hand mixer, whip the mixture on medium speed until it reaches soft peaks, about 3-5 minutes. For the chocolate variation, add cocoa powder at this stage and continue to whip until well combined. This creamy base is what makes your sandwich ice cream so indulgent.
Step 3: Fill the Waffle Sheet
Spread the prepared ice cream mixture evenly over the waffle sheet in the baking dish, ensuring a smooth and even layer. Use a spatula to help create an even surface, making sure the ice cream fills every corner. This step is crucial for achieving the perfect ice cream sandwich texture once frozen.
Step 4: Cover
Gently place a second waffle sheet on top of the ice cream layer. Press down lightly to compress the layers together, ensuring they adhere without squishing the ice cream out. This forms the top of your sandwich ice cream, locking in all that creamy goodness.
Step 5: Freeze
Transfer the baking dish to the freezer, allowing the sandwich ice cream to firm up for at least 5-8 hours or until completely solid. This freezing time is vital for achieving that perfect bite, so be patient and resist the temptation to dig in too early.
Step 6: Serve
Once frozen solid, remove the sandwich ice cream from the dish using the parchment paper for support. Place it on a cutting board and slice into squares or rectangles, depending on your preference. Each piece reveals the creamy, dreamy interior, ready to be enjoyed as a refreshing summer dessert.
Make Ahead Options
These 3-Ingredient Sandwich Ice Creams are perfect for busy home cooks looking to save time! You can prepare the ice cream base up to 24 hours in advance. Simply mix the heavy cream and sweetened condensed milk, then spread it onto the waffle sheets and cover with another sheet. After that, freeze the entire assembly for 5-8 hours, or until solid. For the best quality, ensure the sandwich ice cream is well wrapped or stored in an airtight container to prevent freezer burn. When you’re ready to serve, let the sandwiches sit at room temperature for a few minutes before slicing; this way, they will be just as delicious as when freshly made!
Expert Tips for Sandwich Ice Cream
-
Chill Ingredients: Always start with cold heavy cream and sweetened condensed milk to whip smooth and creamy ice cream. This ensures the best texture for your sandwich ice cream.
-
Whipping Wisely: Whip until soft peaks form but avoid overwhipping, which can make the mixture grainy. Remember, gentle is key!
-
Layer Evenly: Spread the ice cream mixture evenly over the waffle sheet to enhance the texture of your sandwich. Aim for a uniform layer for consistent bites.
-
Freeze Thoroughly: Be patient and freeze for 5-8 hours until solid; this is crucial for a firm, delightful sandwich.
-
Easier Slicing: Let the sandwich ice cream sit at room temperature for a few minutes before slicing. This makes cutting much easier and more enjoyable!
Sandwich Ice Cream Variations & Substitutions
Personalize your sandwich ice cream creation to suit your taste buds and cravings!
-
Fruity Twist: Add fruit puree or jam to the cream mixture for a refreshing burst of flavor. Try a strawberry or raspberry puree for a delightful summertime zing.
-
Nutty Delight: Incorporate chopped nuts or chocolate chips for a crunchy texture contrast. Almonds or walnuts add a lovely nuttiness, while chocolate chips bring extra sweetness.
-
Minty Fresh: Stir in a few drops of peppermint extract to the ice cream base for a cool and invigorating mint flavor. It’s like summer in every bite!
-
Zesty Lemon: A hint of lemon zest can transform your ice cream into a bright, zesty treat. It pairs beautifully with the creamy base, creating a refreshing balance.
-
Coconut Cream: Substitute some of the heavy cream with coconut cream for a tropical twist. The creamy richness paired with a hint of coconut brings the beach vibes to your dessert table.
-
Spiced Cocoa: For added warmth, mix in a sprinkle of cinnamon or a dash of cayenne pepper with the cocoa powder in the chocolate variation. It creates a surprising and delightful flavor contrast!
-
Swirled Delight: Before freezing, swirl in some caramel or chocolate sauce into the ice cream mixture for an indulgent finish. These ribbons of sweetness enhance both flavor and visual appeal.
-
Vegan Option: For a dairy-free version, replace heavy cream with coconut or almond cream and the sweetened condensed milk with pure maple syrup or a vegan sweetened condensed milk. Enjoy the deliciousness without the dairy!
These variations can help cater to different dietary preferences, elevate the flavor profile, and inspire incredible new creations. As you play with these substitutions, consider pairing your sandwich ice cream with Avocado Cream Sauce for a unique twist on texture or serving alongside some delightful Corn Pasta Salad for a refreshing summer meal!
What to Serve with Sandwich Ice Cream?
Treat yourself and your guests to a delightful summer experience with mouthwatering sides that complement the sweet, creamy flavors of your ice cream sandwiches.
-
Fresh Berries: A mix of strawberries, raspberries, and blueberries offers a tart contrast, enhancing the sweetness of the sandwich ice cream while adding a refreshing burst of flavor.
-
Chocolate Sauce: Drizzling warm chocolate sauce over your ice cream sandwich creates a luscious treat, intensifying the indulgence and adding an irresistible finish.
-
Crunchy Cookies: Pair with crushed chocolate or vanilla wafer cookies for a delightful crunch on the side, elevating the textural experience of this creamy dessert.
-
Mint Leaves: Garnish your plate with a sprig of fresh mint to add a touch of color and an invigorating flavor that beautifully complements the richness of the ice cream.
-
Iced Coffee: Serve a sweetened iced coffee alongside your sandwich ice cream for a refreshing beverage that balances the dessert’s sweetness with a hint of caffeine.
-
Pineapple Sorbet: This tropical sorbet introduces a fruity, tangy element that brightens the palate and offers a cooling counterpart to the richness of your dessert.
-
Milkshakes: Try a classic milkshake that mirrors your sandwich ice cream flavor for a nostalgic twist—a blend of ice cream, milk, and a hint of vanilla transports you back to childhood summers.
-
Nut Mix: A handful of lightly salted mixed nuts can add a pleasing crunch and a savory note, creating a balanced contrast to the overall sweetness of the sandwich ice cream.
Storage Tips for Sandwich Ice Cream
- Fridge: Store any leftover sandwich ice cream in an airtight container to maintain freshness for up to 3 days. However, it’s best enjoyed frozen!
- Freezer: Keep your sandwich ice cream tightly wrapped in plastic wrap or in an airtight container for optimal quality, lasting up to 2 weeks.
- Reheating: For easier slicing, let the sandwich ice cream sit at room temperature for about 5 minutes before cutting into pieces, ensuring a smooth experience.
- Make-Ahead: Since it freezes well, you can prepare your sandwich ice cream in advance, making it a perfect dessert for parties or hot summer days!

Sandwich Ice Cream Recipe FAQs
How do I choose the right ripe ingredients for the ice cream?
Absolutely! For the best results in your sandwich ice cream, ensure that your Sahne (heavy cream) is fresh and cold for optimal whipping. The sweetened condensed milk should also be fresh to avoid any off-flavors. Waffle sheets should be intact and free of any dark spots or cracks, which can affect the texture of your ice cream sandwich.
What are the best storage methods for leftover sandwich ice cream?
Very! To keep your sandwich ice cream fresh, store any leftovers in an airtight container or tightly wrapped in plastic wrap. They will remain at their best for up to 2 weeks in the freezer. Just remember, the sooner you can enjoy them, the better, as freshness impacts taste.
Can I freeze sandwich ice cream? If so, how?
Absolutely! To freeze your sandwich ice cream, simply follow the recipe and let it freeze for at least 5-8 hours until completely solid. Once frozen, store the sandwiches in an airtight container or wrap them snugly in plastic wrap. This way, they can last up to 2 weeks without losing their delightful texture and flavor.
What should I do if my ice cream mixture isn’t thickening properly?
If your ice cream mixture isn’t thickening as expected, there could be a couple of reasons. First, ensure your heavy cream is really cold—this helps it whip up nicely. When whipping, watch for soft peaks, but don’t overwhip, as this can lead to a grainy texture. If you’ve followed this and it’s still not thickening, you might mix in a bit more condensed milk to adjust the consistency.
Are there any allergens I should consider when making sandwich ice cream?
Yes! If you’re making sandwich ice cream, be mindful of any allergies, especially dairy (heavy cream and condensed milk). For those with lactose intolerance, consider using lactose-free heavy cream. Always read the labels of the waffle sheets, as they may contain allergens like gluten or nuts, depending on the brand. Always check with your guests regarding any dietary restrictions before serving.
Can I make variations of my sandwich ice cream for different dietary needs?
Very! You can customize your sandwich ice cream to cater to various dietary preferences. For a vegan option, substitute heavy cream with coconut cream and use coconut milk as a replacement for sweetened condensed milk. Additionally, you can opt for gluten-free waffle sheets to accommodate those who need to avoid gluten. Feel free to get creative with flavorings as well, incorporating fruits or nut butters!
Delicious Homemade Sandwich Ice Cream for Summer Bliss
Ingredients
Equipment
Method
- Line a rectangular baking dish with parchment paper. Place one waffle sheet at the bottom.
- In a mixing bowl, combine cold heavy cream and sweetened condensed milk. Whip until soft peaks form, about 3-5 minutes. For chocolate variation, add cocoa powder.
- Spread the ice cream mixture evenly over the waffle sheet.
- Place a second waffle sheet on top and press down lightly.
- Transfer the baking dish to the freezer for at least 5-8 hours.
- Once frozen, remove from the dish and slice into squares or rectangles.
Leave a Reply