
As the days grow shorter and the leaves crunch beneath our feet, it’s time to embrace the ghoulishly delightful spirit of Halloween! This year, I’m excited to share my collection of 14 spooktacular Halloween dessert recipes, featuring fun treats like Spooky Spider Cookies that will add a whimsical touch to any gathering. These easy recipes aren’t just for kids—they’re a perfect way for adults to join in on the festive fun, too! From rich chocolate cakes to colorful cupcakes, every dessert promises to thrill your taste buds and bring smiles to your table. Who’s ready to conjure up some sweet memories and perhaps a few giggles along the way? Let’s dive into these hauntingly delicious creations together!
Why Are Spooky Spider Cookies a Must-Make?
Eerie Appeal: These cookies are not only delicious, but their creepy-crawly designs make them irresistible for Halloween gatherings!
Kid-Friendly Fun: Involve the little ones in decorating—it’s a re-spun family activity that doubles as a playful lesson in creativity.
Easy to Customize: Use your favorite cookie base, whether that’s a classic sugar cookie or a chocolaty twist, making it versatile for everyone’s taste.
Crowd-Pleasing Treat: Their charming look and delightful taste guarantee smiles from both kids and adults alike, making them perfect for any Halloween celebration.
Quick Preparation: With simple ingredients and easy steps, these Spooky Spider Cookies can be whipped up in no time, leaving you plenty of moments to enjoy the festivities!
If you enjoy this, you might also love making a batch of Spooky Spiderweb Brownies or serving them alongside some Kitchen Sink Cookies for a deliciously spooky spread!
Spooky Spider Cookies Ingredients
• Here’s everything you’ll need to whip up a batch of these delightfully creepy treats!
For the Cookie Base
- Sugar Cookies – A classic choice that provides a sweet canvas for your spookiness!
- Butter – Use unsalted for better control over the sweetness.
- Eggs – Bind the ingredients together; allow them to reach room temperature for best results.
- Vanilla Extract – Enhances flavor; feel free to use almond extract for a twist.
For the Decorations
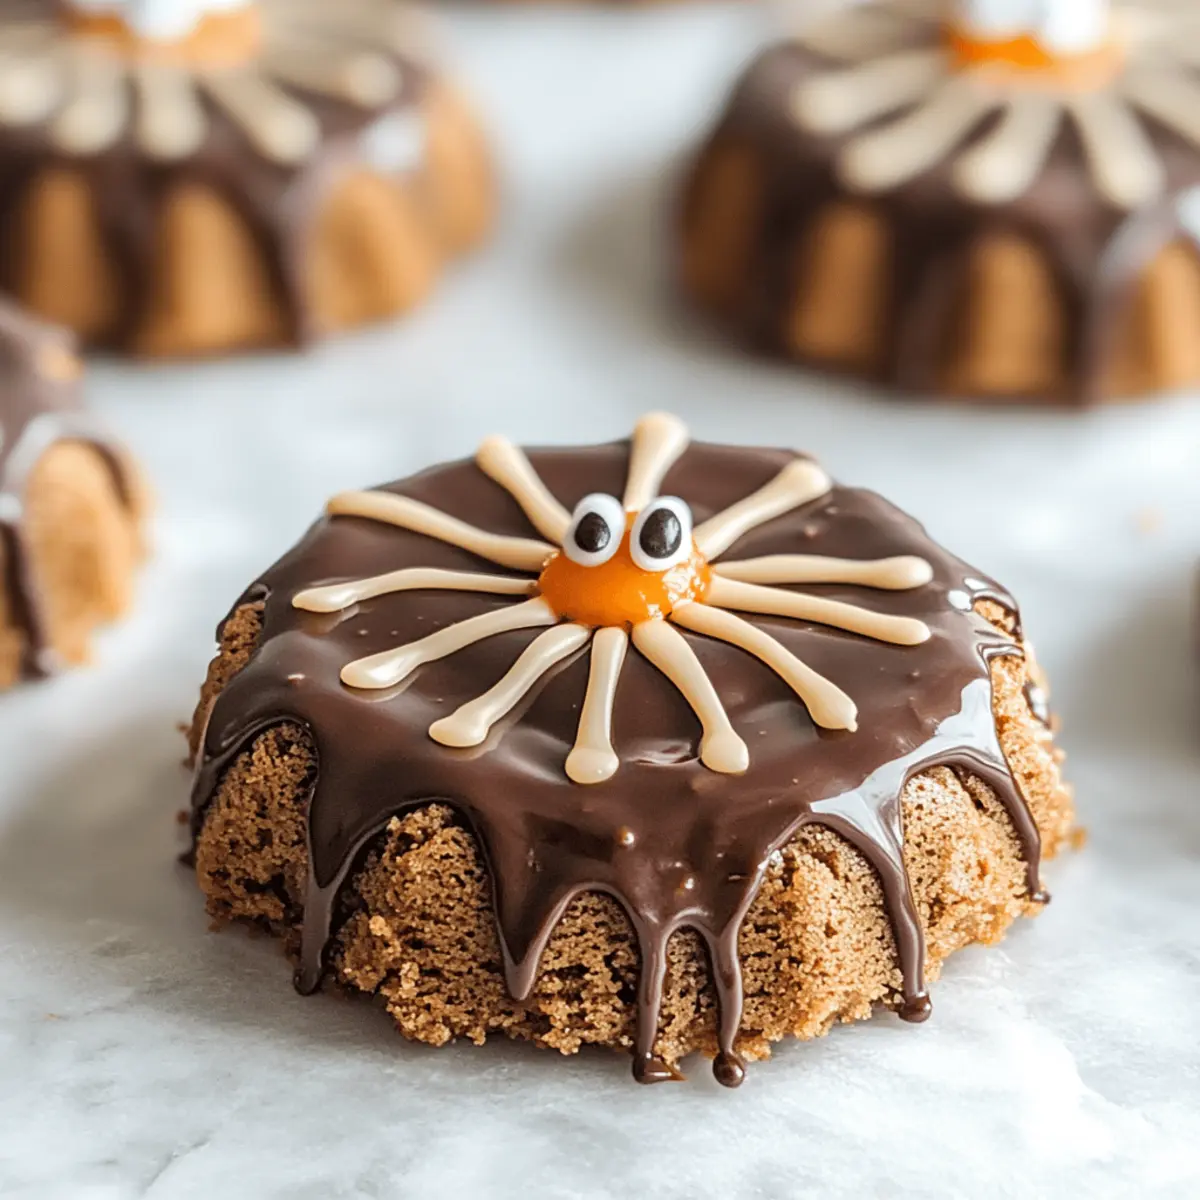
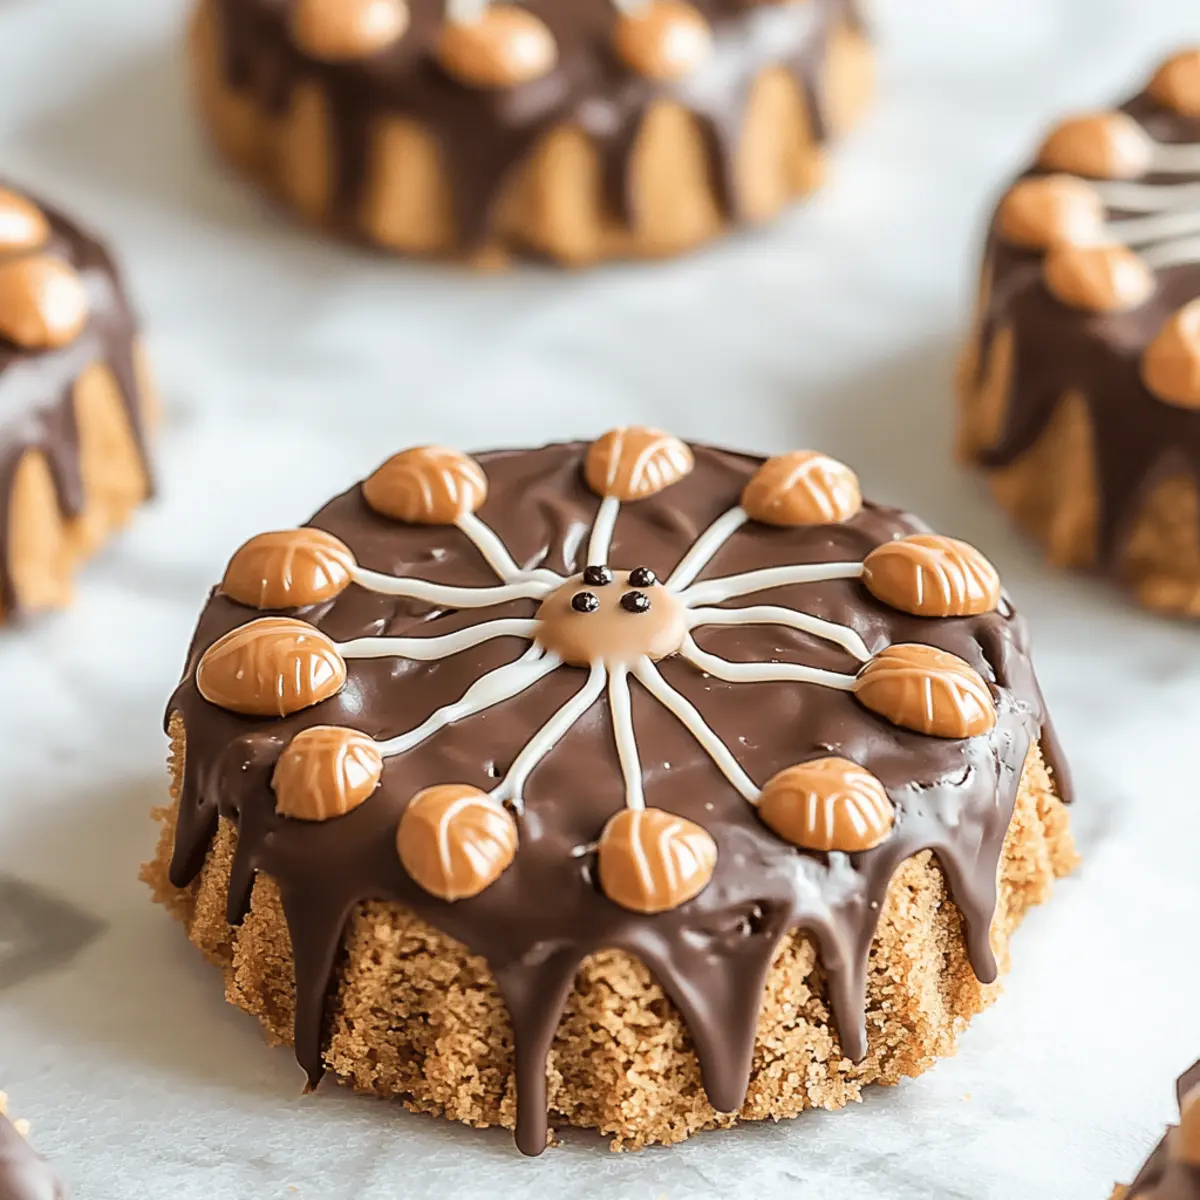
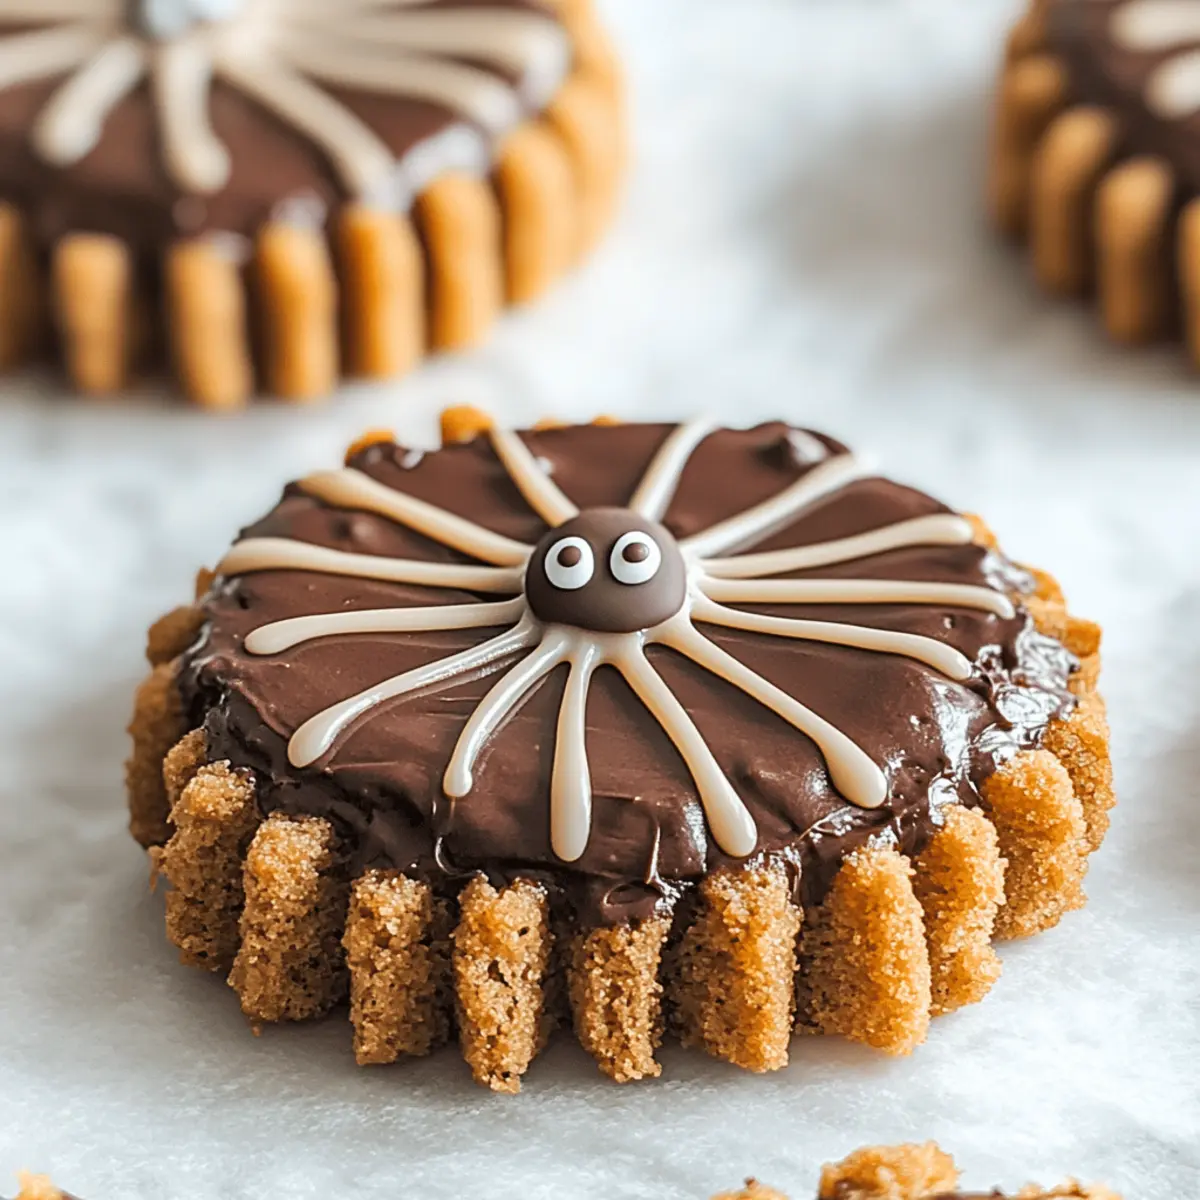
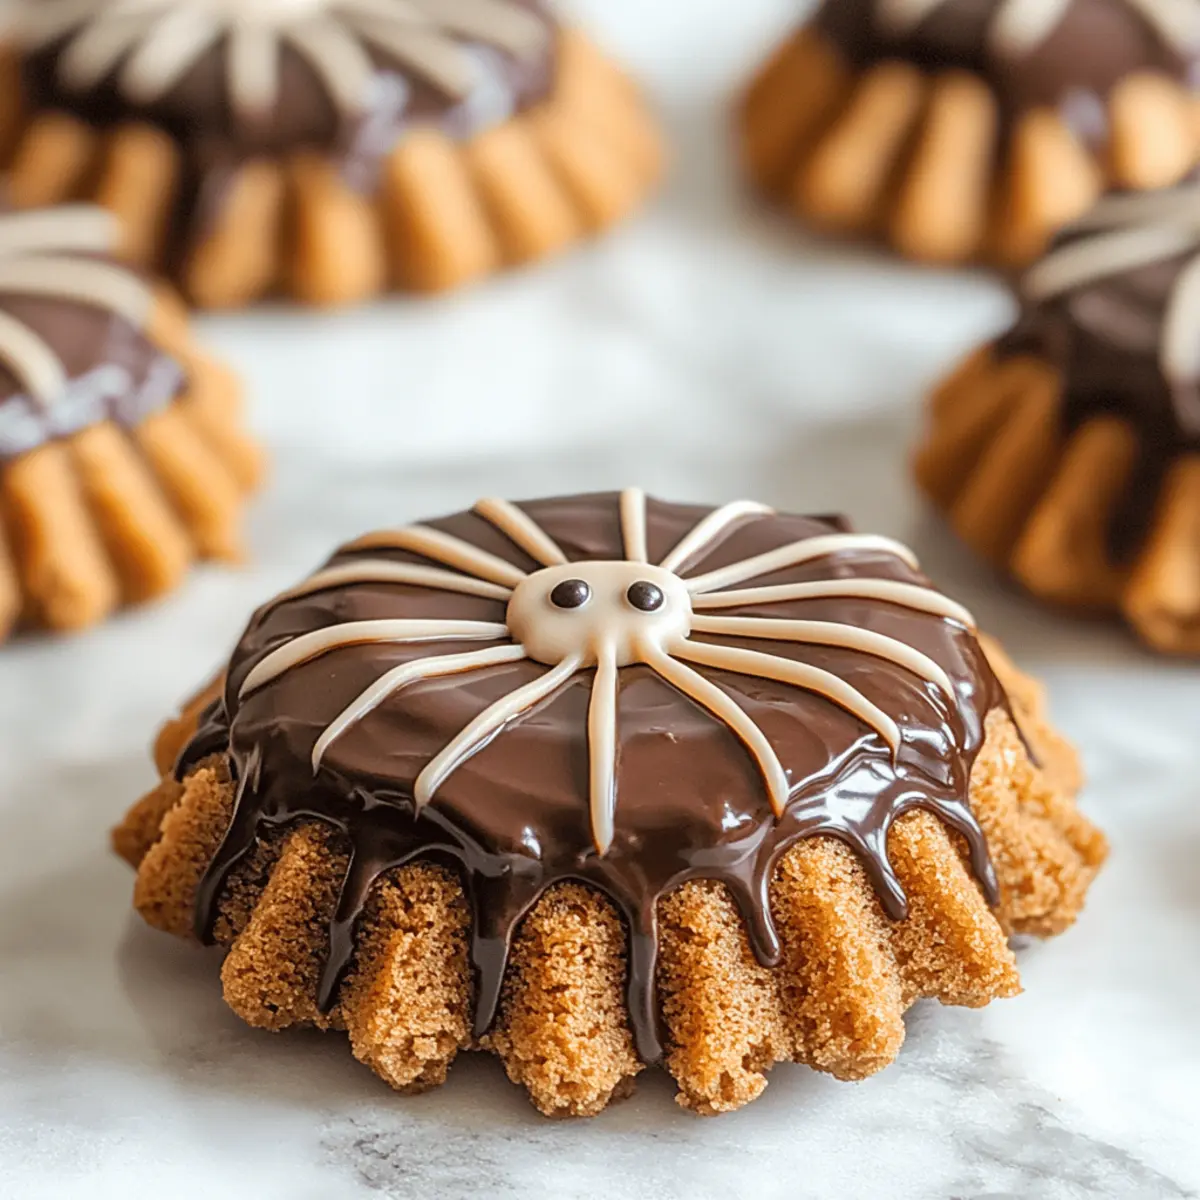
- Chocolate Frosting – Spread on top to create a base for your spider!
- Chocolate Licorice Laces – Perfect for spider legs; use them creatively for that eerie effect.
- Candy Eyes – Get those spooky vibes with these sweet little additions!
- Gel Food Coloring – Use black for the spider’s body; it can transform your frosting into frightfully fun art.
For Optional Flavor Twists
- Cocoa Powder – Mix in for a chocolaty spider theme!
- Sprinkles – Choose Halloween-themed sprinkles to add an extra pop of color and fun!
These Spooky Spider Cookies are not just delicious; they also offer a canvas for creativity in the kitchen, bringing the spirit of Halloween to life!
Step‑by‑Step Instructions for Spooky Spider Cookies
Step 1: Prepare the Cookie Dough
In a large mixing bowl, cream together 1 cup of unsalted butter and 1 cup of sugar until fluffy, about 2-3 minutes. Add 2 eggs (at room temperature) and 1 teaspoon of vanilla extract, mixing until well combined. Gradually mix in 3 cups of flour and a pinch of salt until a soft dough forms. Refrigerate the dough for about 30 minutes to help it hold its shape during baking.
Step 2: Bake the Cookies
Preheat your oven to 350°F (175°C) and line baking sheets with parchment paper. Roll out the chilled dough on a floured surface to about 1/4-inch thick, then cut out spider-shaped cookies using a cookie cutter. Place them on the prepared baking sheets, ensuring there’s space between each. Bake for 8-10 minutes until the edges are slightly golden. Allow them to cool completely on a wire rack before decorating.
Step 3: Frost and Decorate
Once your Spooky Spider Cookies have cooled, it’s time to get creative! Spread a generous layer of chocolate frosting on each cookie to create a dark, spooky surface. For a fun twist, add a drop of gel food coloring to the frosting before spreading it for a striking look. Make sure the frosting is smooth and even to ensure your spider decorations hold well.
Step 4: Add Spider Legs
Using candy laces or twisted chocolate licorice, cut them into strips to represent spider legs. Stick them into the frosting, fanning them out from the center of the cookie to create that classic spider shape. You can create telegraphic spider designs—some with fewer legs for a cute appearance!
Step 5: Complete the Look with Eyes
Finish your Spooky Spider Cookies by adding candy eyes to the center of the cookie. Gently press in one or two edible eyes on each spider to give them a fun, creepy look. Use extra frosting as glue if necessary. Once your spiders are all dressed up, let them set for a few minutes before serving them to your eager guests.
Step 6: Display and Enjoy
Arrange your completed Spooky Spider Cookies on a festive platter or Halloween-themed dish to showcase your creativity. These delightful treats not only serve as tasty snacks but also as festive decorations for your Halloween gathering. Let everyone indulge in these deliciously spooky cookies and share in the fun of creating them together!
Expert Tips for Spooky Spider Cookies
-
Chill the Dough: Refrigerating the cookie dough helps maintain its shape while baking, preventing overly spread cookies that lose their spooky form.
-
Use Piping Bags: For decorating with chocolate frosting, using piping bags makes it easier to control the thickness and design for your spiders’ bodies and legs.
-
Ingredient Quality Matters: Opt for high-quality chocolate frosting and candy eyes to enhance both flavor and appearance for these Spooky Spider Cookies.
-
Avoid Overbaking: Keep an eye on the cookies while they’re in the oven—the edges should be just lightly golden. Overbaking can result in dry cookies.
-
Get Creative: Don’t hesitate to mix and match decorations! Extra sprinkles or edible glitter can make your Spooky Spider Cookies even more festive and enticing.
How to Store and Freeze Spooky Spider Cookies
Room Temperature: Store Spooky Spider Cookies in an airtight container at room temperature for up to 5 days to maintain freshness and prevent them from becoming stale.
Fridge: If you’d like to extend their shelf life, you can refrigerate the cookies in a sealed container for up to a week. Just allow them to come to room temperature before serving for the best flavor.
Freezer: For longer storage, freeze the cookies (without the frosting) in an airtight container for up to 3 months. To enjoy, simply thaw them in the fridge overnight.
Reheating: When ready to serve, you can gently warm the cookies in the oven at a low temperature (around 300°F/150°C) for about 5 minutes, ensuring they’re soft and inviting!
What to Serve with Spooky Spider Cookies?
Looking to elevate your Halloween gathering? Pair these delightful treats with some fun, festive options!
- Warm Apple Cider: The sweet and spiced notes of apple cider perfectly balance the sugary cookies and enhance the autumnal spirit.
- Chocolate Milk: Rich and creamy, this kid-favorite beverage adds a nostalgic touch, making every bite of cookie feel extra special.
- Ghoulish Green Punch: A vibrant, fruity drink with fun floating gummy worms captures the festive essence of Halloween. This lively beverage is sure to evoke giggles and smiles!
- Pumpkin Flavored Coffee: Enjoy the cozy blend of pumpkin spices that complements the Halloween theme while providing a warm, comforting drink choice.
- Fruity Ghosts: Carve strawberries or bananas into ghostly shapes, offering a healthy and playful side. Their freshness cuts through the sweetness of the cookies beautifully!
- Haunted Trail Mix: Combine nuts, seeds, and festive candies for a crunchy snack that provides varied textures and flavors, balancing sweet and savory!
- Chocolate-Dipped Pretzels: The salty crunch of pretzels dipped in chocolate adds a perfect contrast to the sweetness of your Spooky Spider Cookies.
- Mini Pumpkin Pies: Serve small, individual pumpkin pies that echo the fall season, adding a classic, beloved flavor to your gathering.
- Ghostly Vanilla Ice Cream: A scoop of creamy vanilla ice cream drizzled with chocolate syrup creates a delightful harmony with the spooky cookies.
- Halloween-themed Cupcakes: Decorate cute cupcakes with orange frosting and edible glitter, bringing colorful excitement to your dessert table!
Spooky Spider Cookies: Customization Ideas
Feel free to unleash your inner creativity and make these Spooky Spider Cookies truly your own with these tempting variations!
-
Flavor Twist: Add a touch of cocoa powder to the cookie dough for a chocolatey spider delight. Your taste buds will thank you for this decadent decadence!
-
Gluten-Free: Substitute regular flour with a gluten-free blend to accommodate dietary preferences, making everyone feel included at your gathering.
-
Colorful Frosting: Swap chocolate frosting for orange or green frosting to bring more festivity and fun into your spider designs. A splash of color always adds excitement!
-
Creative Legs: Use pretzel sticks or gummy worms instead of licorice for a fun twist on the spider legs. Kids will get a kick out of the unexpected elements!
-
Nutty Addition: Incorporate finely chopped nuts into the cookie dough for added texture and crunch. How about some walnuts or pecans?
-
Decorative Sprinkles: Sprinkle Halloween-themed colors or edible glitter on top of the frosting for an extra eye-catching appearance. Who can resist a bit of sparkle at Halloween?
-
Mini Spiders: Create mini versions of your cookies using a smaller cutter; they’ll be perfect for bite-sized treats that everyone can enjoy!
-
Filling Surprise: Add a gooey filling like raspberry or orange jam inside the cookie for a delightful fruity surprise when bitten into. It’ll surprise and delight all who taste them!
Make sure to check out these other festive recipes, like Spooky Spiderweb Brownies or even a fun batch of Velvet Crinkle Cookie to complete your Halloween spread!
Make Ahead Options
These Spooky Spider Cookies are perfect for meal prep during the bustling Halloween season! You can prepare the cookie dough up to 3 days in advance; simply wrap it tightly in plastic wrap or store it in an airtight container in the refrigerator. Additionally, you can bake the cookies and store them in an airtight container for up to 5 days, which ensures they remain just as delicious! To assemble the cookies, simply frost and add the decorations the day you plan to serve them, ensuring a fresh and appealing presentation. This way, you can save time while still impressing your guests with these delightful treats!
Spooky Spider Cookies Recipe FAQs
How do I choose the right sugar cookies for my Spooky Spider Cookies?
Absolutely! For the base of your Spooky Spider Cookies, choose a sugar cookie recipe that is thick enough to hold its shape during baking. Look for a recipe that includes powdered sugar, as it provides a softer texture and better flavor. You can also make them more chocolatey by incorporating cocoa powder into the mix, enhancing both flavor and fun!
What is the best way to store Spooky Spider Cookies?
To keep your Spooky Spider Cookies fresh, store them in an airtight container at room temperature for up to 5 days. If you want to extend their lifespan, refrigerate them in a sealed container, where they will last up to a week. Remember, allowing them to come to room temperature before serving enhances the flavors—so delicious!
Can I freeze my decorated Spooky Spider Cookies?
Yes! Freezing your Spooky Spider Cookies is a great way to save time for future celebrations. To freeze, place the cookies (without frosting) in an airtight container, layering parchment paper in between to prevent sticking. They can stay fresh for up to 3 months. When you’re ready to enjoy them, just thaw in the fridge overnight, frost them, and they’re ready to impress!
What if my cookies spread too much while baking?
Very! If your cookies spread too much while baking, it could be due to warm dough. Make sure to chill the cookie dough for at least 30 minutes before rolling it out. Additionally, ensure your oven is preheated to the right temperature. If the dough is warm or your oven is too cool, cookies may lose their shape. If needed, add a bit more flour to the dough for a firmer consistency.
Are there any dietary considerations for Spooky Spider Cookies?
Yes, definitely! If you’re making Spooky Spider Cookies with dietary restrictions in mind, consider using gluten-free all-purpose flour for a gluten-free option. For those with nut allergies, be cautious about any ingredients like chocolate that may have come into contact with nuts. Always check labels to ensure all components are safe for those who will be indulging in your spooky treats!
Spooky Spider Cookies: Fun Treats for a Hauntingly Good Time
Ingredients
Equipment
Method
- In a large mixing bowl, cream together the butter and sugar until fluffy, about 2-3 minutes.
- Add the eggs and vanilla extract, mixing until well combined.
- Gradually mix in the flour and salt until a soft dough forms.
- Refrigerate the dough for about 30 minutes.
- Preheat the oven to 350°F (175°C) and line baking sheets with parchment paper.
- Roll out the dough to about 1/4-inch thick and cut out spider shapes.
- Bake for 8-10 minutes until edges are slightly golden and allow to cool completely.
- Spread a layer of chocolate frosting on each cookie.
- Add food coloring for a spooky look and decorate with licorice legs and candy eyes.
- Arrange on a platter and enjoy!
Leave a Reply