
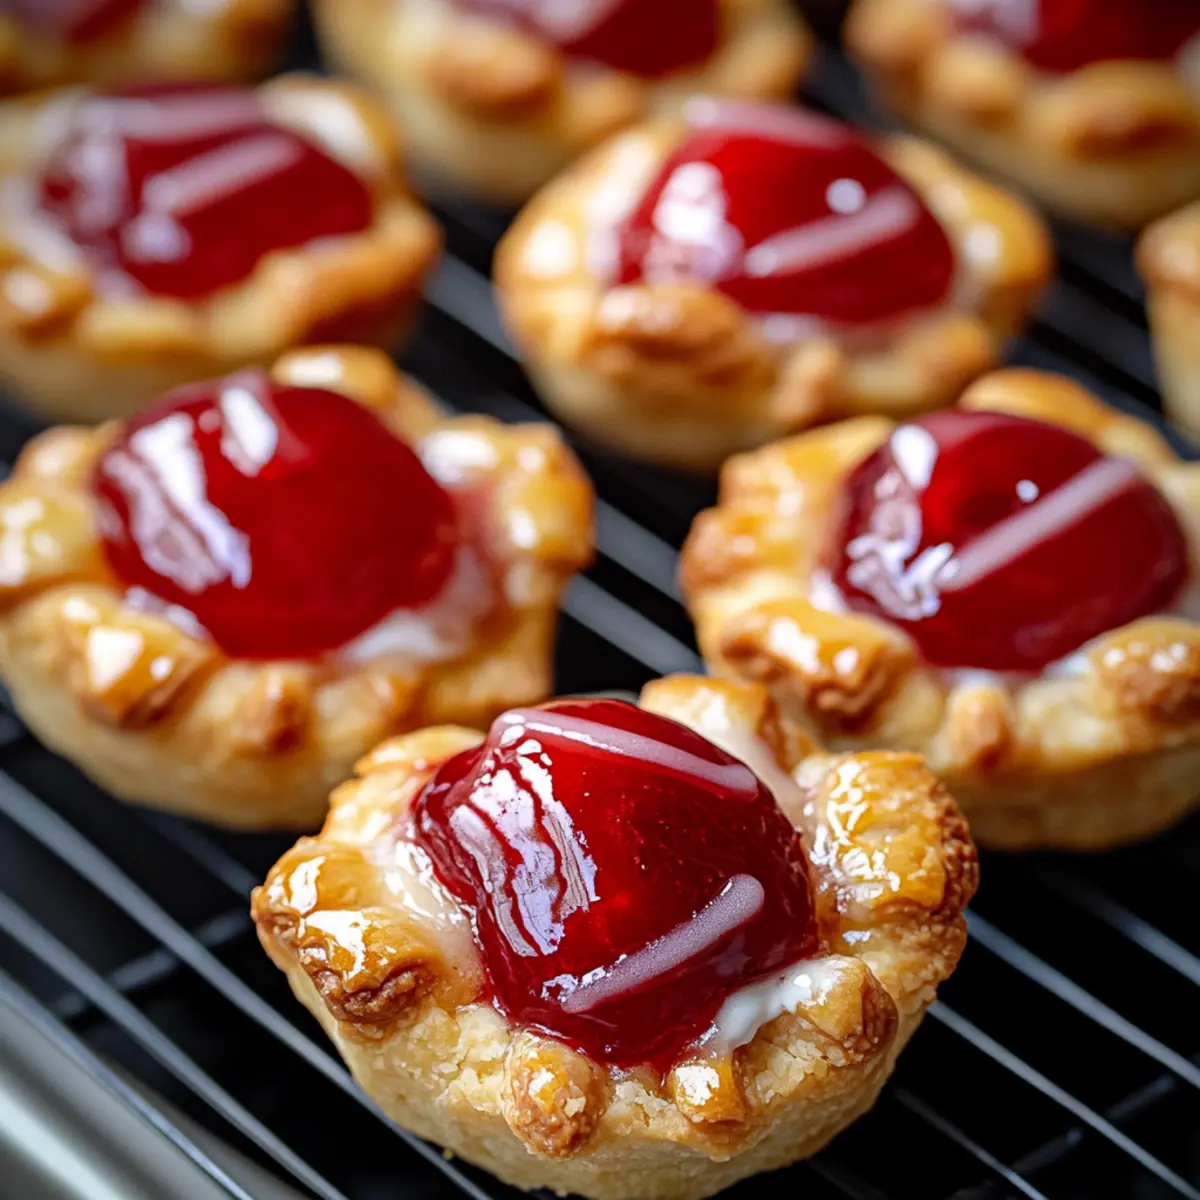
As I cracked open a can of cherry pie filling one afternoon, the sweet aroma instantly transported me back to childhood summers spent at the county fair. These Easy Cherry Pie Bites capture that nostalgic flair in a delightful, bite-sized dessert that’s not only quick to whip up, but also a guaranteed crowd-pleaser. With their flaky crescent roll dough encasing a luscious filling, these treats are incredibly versatile, ready to accommodate your favorite pie variations, from blueberry to apple. Perfect for potlucks, birthday parties, or a cozy night in, they’re budget-friendly and give you that warm, comforting taste of home without the fuss. What’s your favorite pie filling to use in a twist on this classic?
Why are these Cherry Pie Bites irresistible?
Quick, delightful treat: Perfect for those who crave something sweet without spending hours in the kitchen. These bites are a fantastic alternative to store-bought desserts!
Versatile flavors: Feel free to swap in your favorite pie fillings—blueberry, apple, or even a mix! The possibilities are endless.
Crowd-pleaser: Ideal for gatherings, these bite-sized delights will have everyone coming back for seconds, just like my Bang Salmon Bites.
Budget-friendly: Made with simple ingredients, these Cherry Pie Bites are easy on both your wallet and your time.
Comforting nostalgia: Enjoy the familiar flavors that remind you of simpler times, all without the need for a fork! Perfect alongside a warm cup of tea or coffee, just like a warm slice of a classic cherry pie.
Cherry Pie Bites Ingredients
• Get ready to create these delightful Cherry Pie Bites!
For the Dough
- Refrigerated Crescent Roll Dough – This provides a flaky, buttery crust that you can’t resist; feel free to substitute with puff pastry for extra flakiness.
For the Filling
- Cherry Pie Filling – The sweet-tart heart of these bites; any favorite pie filling, like blueberry or apple, can make a delicious variation.
- Cream Cheese (optional) – Adds a rich, creamy layer resembling cheesecake; it can be omitted if you prefer a simpler filling.
For Sweetening
- Powdered Sugar – This sweetens your cream cheese mixture perfectly, balancing the tartness of the cherries.
- Vanilla Extract – Enhances the overall flavor, making your bites taste divine.
For Topping
- Butter (melted) – Brushed on top for a golden finish, elevating visual appeal and taste.
- Coarse Sugar (optional) – Adds a delightful crunch on top; it’s an impressive finishing touch!
- Powdered Sugar Glaze (optional) – Made from powdered sugar and milk for extra sweetness and a lovely drizzle effect.
Enjoy making these Cherry Pie Bites and prepare to share a deliciously warm experience!
Step‑by‑Step Instructions for Cherry Pie Bites
Step 1: Preheat and Prepare the Baking Sheet
Begin by preheating your oven to 375°F (190°C) while you line a baking sheet with parchment paper. This will keep your Cherry Pie Bites from sticking and ensure even baking. As the oven heats up, take a moment to gather all your ingredients and tools, so you’re ready for the next steps.
Step 2: Mix the Cream Cheese Filling
In a small bowl, combine the cream cheese, powdered sugar, and vanilla extract. Using a hand mixer or a fork, blend the mixture until it’s smooth and creamy, which should take about 2-3 minutes. This delightful cream cheese filling adds richness to your Cherry Pie Bites, enhancing the overall flavor and texture.
Step 3: Unroll the Crescent Dough
Carefully unroll the refrigerated crescent roll dough on a clean, flat surface. Separate the dough into triangles as indicated on the package. The dough should be soft and easy to work with, providing the perfect flaky crust for your Cherry Pie Bites.
Step 4: Fill Each Triangle
Place about a teaspoon of your cream cheese mixture at the wide end of each triangle, followed by 1-2 teaspoons of cherry pie filling. Be careful not to overfill, as it can lead to messy bites. This balance of creaminess and cherry sweetness is crucial for that classic taste in your Cherry Pie Bites.
Step 5: Fold and Seal the Bites
Gently fold the corners of each triangle over the filling, pinching the seams tightly to seal the edges. Leaving a bit of the filling exposed will allow for a beautifully rustic look. If you prefer, you can crimp the edges with a fork to ensure a secure seal that prevents any filling from leaking during baking.
Step 6: Arrange on the Baking Sheet
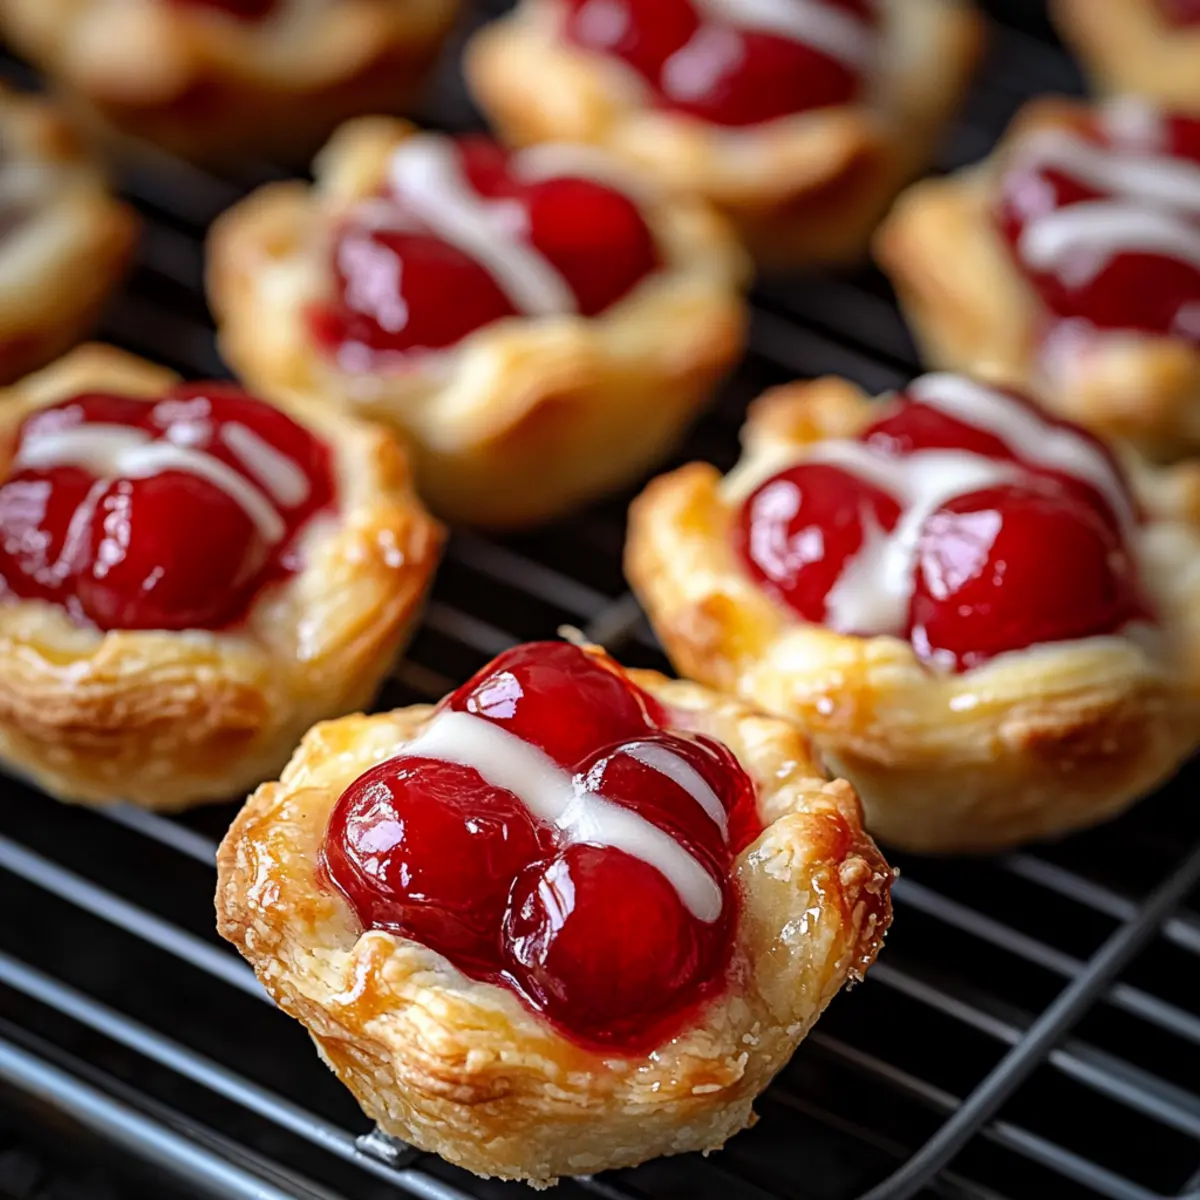
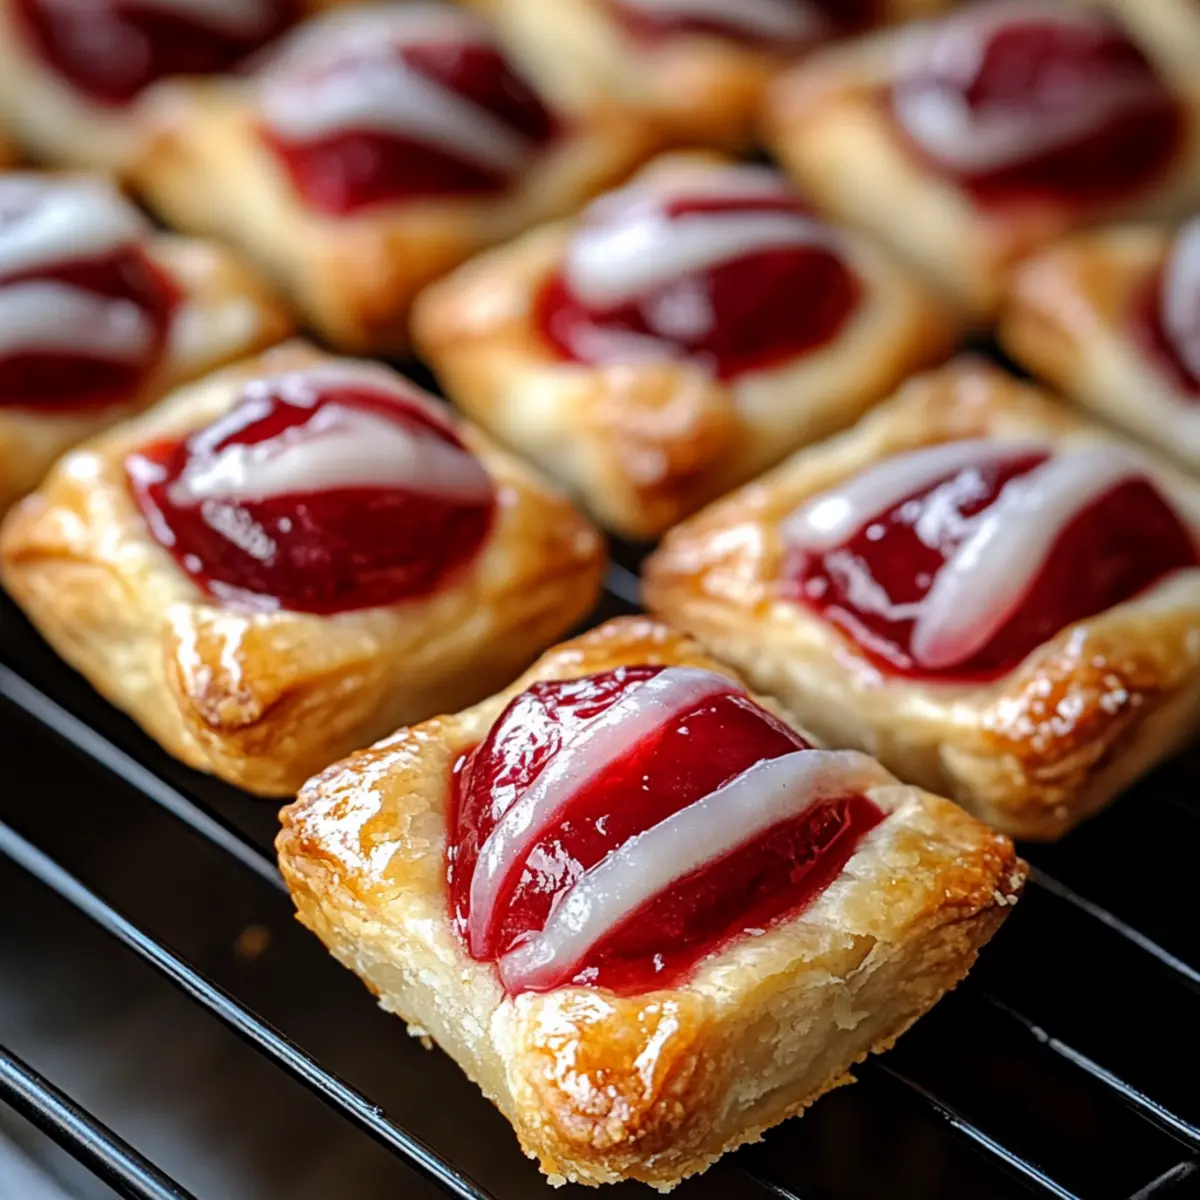
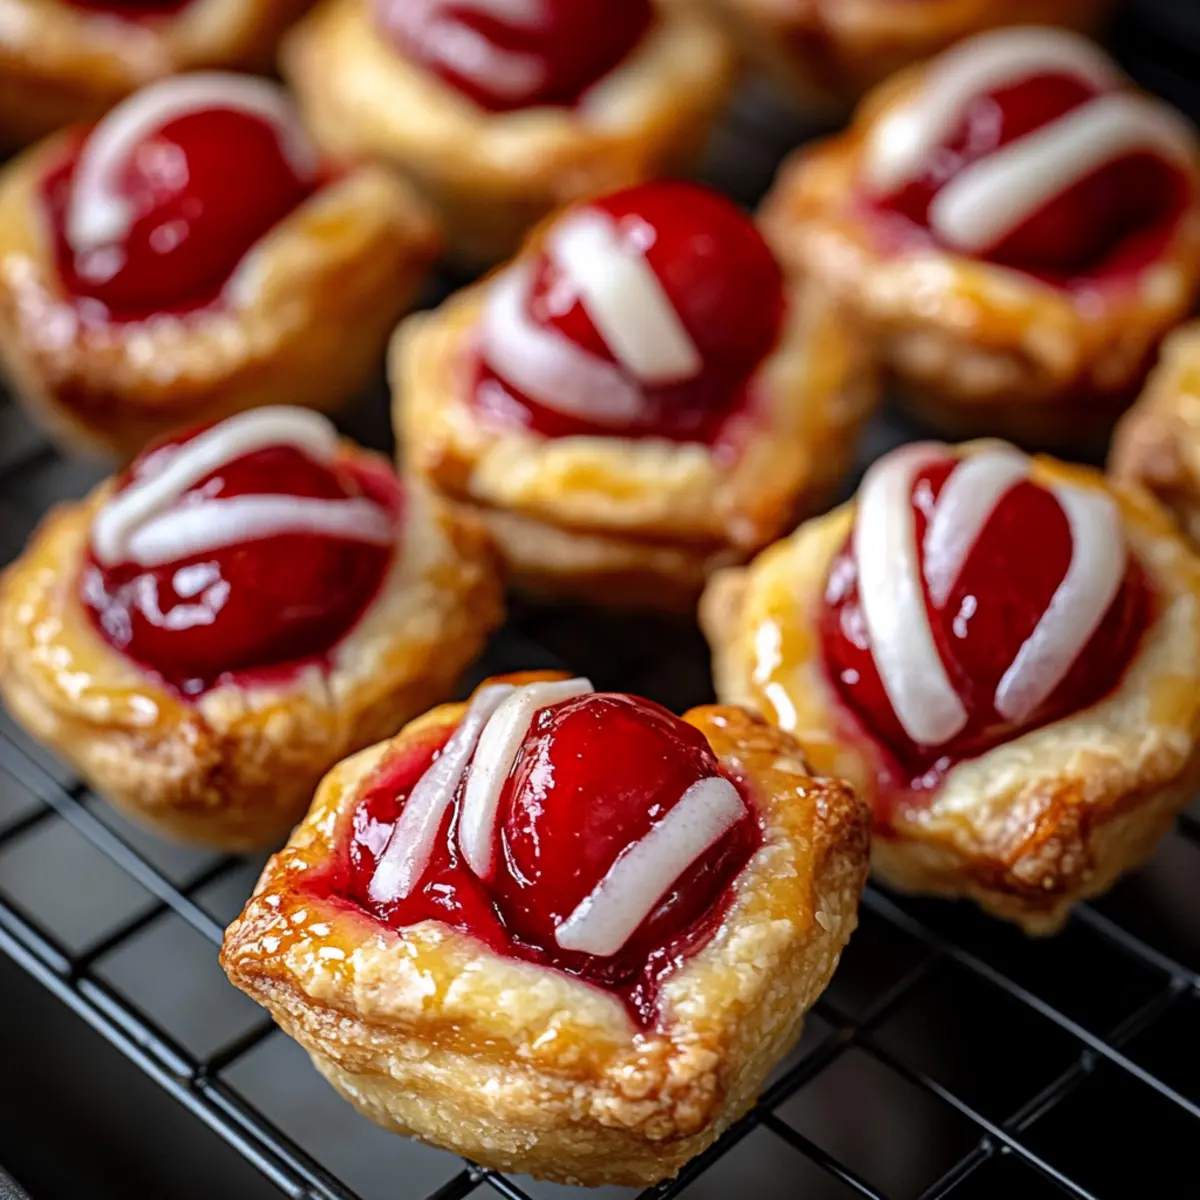
Place the filled and sealed Cherry Pie Bites onto the prepared baking sheet, giving them some space to expand as they bake. Brush the tops lightly with melted butter for that golden finish and sprinkle with coarse sugar if desired for an extra sweet crunch.
Step 7: Bake Until Golden
Slide the baking sheet into your preheated oven and bake the Cherry Pie Bites for 10-12 minutes. Keep an eye on them, and once they’re golden brown and puffed up, you’ll know they’re ready to come out. The delicious aroma will fill your kitchen, heightening your anticipation!
Step 8: Cool and Glaze
Once baked, remove the bites from the oven and let them cool slightly on the baking sheet for about 5 minutes. For an extra touch, drizzle the optional powdered sugar glaze over the warm bites for added sweetness and a lovely visual appeal. They’re now ready to be served warm, perfect for sharing or indulging solo!
Storage Tips for Cherry Pie Bites
Room Temperature: Store in an airtight container for up to 2 days to maintain freshness and texture. Enjoy them warm for the best experience!
Refrigerator: Keeps for up to 5 days; place in an airtight container. For a rejuvenating bite, reheat in the oven for 5-7 minutes until warm and crisp.
Freezer: Baked or unbaked Cherry Pie Bites can be frozen for up to 2 months. Reheat baked ones directly from frozen, or thaw and bake unbaked bites straight away for a fresh treat.
What to Serve with Cherry Pie Bites?
Indulging in these warm, sweet Cherry Pie Bites opens the door to a delightful meal pairing experience that evokes comforting nostalgia.
- Vanilla Ice Cream: A classic match! The creamy texture and vanilla flavor beautifully balance the cherry’s tartness, creating a delightful contrast.
- Fresh Whipped Cream: Whip up some cream for a light, fluffy topping that enhances the bites’ sweetness while adding richness to each mouthful.
- Coffee: A warm cup of rich coffee is an excellent companion, balancing the sweetness of the bites, making for a perfect snack or dessert moment.
- Tea (Earl Grey or Chamomile): For a soothing touch, pair with brewed tea. The floral notes of chamomile or the citrusy hint of Earl Grey elevate the flavors of cherries.
- Fruit Salad: Add freshness to your plate! A colorful fruit salad not only boosts nutrients but also lends a refreshing contrast to the warm, sweet bites.
- Chocolate Drizzle: For a decadent twist, drizzle melted chocolate over the bites. This adds an extra layer of richness and visual appeal to your dessert spread.
- Cheese Platter: A mix of tangy cheeses like goat or brie can create a unique contrast, inviting lively conversations around flavors. The creaminess from the cheese defies traditional pairings!
- Sparkling Water or Lemonade: Refreshing beverages like sparkling water with a twist of lemon or homemade lemonade can enhance the dessert’s experience, keeping things light and bubbly.
- Nutty Biscotti: Serve a few biscotti on the side for added texture; their crunch will complement the soft, gooey nature of the Cherry Pie Bites perfectly.
Cherry Pie Bites Variations & Substitutions
Feel free to get creative and tailor these Cherry Pie Bites to your taste buds with some delightful twists!
-
Dairy-Free: Substitute cream cheese with a dairy-free cream cheese alternative for a similar texture and flavor.
-
Gluten-Free: Use gluten-free crescent roll dough or a gluten-free pie crust to accommodate dietary needs without sacrificing deliciousness.
-
Different Fillings: Instead of cherry, try swapping the filling with blueberry, peach, or even a mix of your favorites for a unique flavor adventure.
-
Chocolate Delight: Add mini chocolate chips to the cherry filling for a surprising chocolatey twist that your taste buds will absolutely adore.
-
Savory Surprise: Transform these bites into a savory treat by using brie cheese and cranberry sauce as the filling for an elegant touch.
-
Festive Drizzle: Elevate your bites by drizzling melted chocolate or a caramel sauce on top for an elegant dessert that’s perfect for special occasions.
-
Nutty Crunch: Incorporate finely chopped nuts, such as walnuts or pecans, into your filling for an added layer of texture and flavor.
-
Spiced Up: Enhance the filling with a pinch of cinnamon or nutmeg for a warm, cozy flavor that evokes the essence of the season.
These variations reflect the same crowd-pleasing delight as links to my Bang Salmon Bites and even Steak Kidney Pie can inspire dinner ideas! Dive in, and enjoy your homemade creations!
Make Ahead Options
These Cherry Pie Bites are a perfect solution for busy weeknights and meal prep enthusiasts! You can prepare the filling and assemble the bites up to 24 hours in advance. Simply fill the crescent dough with the cream cheese mixture and cherry pie filling, then gently seal them. Arrange the assembled bites in a single layer on a baking sheet, cover with plastic wrap, and refrigerate. To maintain their freshness, avoid brushing with butter and adding sugar until just before baking. When you’re ready to enjoy them, preheat your oven, brush the tops with butter, sprinkle with sugar, and bake at 375°F (190°C) for 10-12 minutes for a delightful treat that’s just as delicious as if you’d made them on the spot!
Expert Tips for Cherry Pie Bites
- Don’t Overfill: Keep about 1 teaspoon of filling max to prevent leaks while baking. Too much filling can lead to messy bites!
- Seal Tightly: Ensure all edges are pinched securely or crimp with a fork to lock in that delicious cherry filling.
- Make Ahead: Prepping these Cherry Pie Bites in advance? Store them in the fridge for up to 24 hours before baking for easy entertaining.
- Even Baking: Rotate the baking sheet halfway through for uniform browning, ensuring every bite is golden and crisp.
- Add Texture: Experiment with toppings! A sprinkle of coarse sugar or a drizzle of glaze can elevate your Cherry Pie Bites.
Cherry Pie Bites Recipe FAQs
What type of cherry pie filling should I use?
Absolutely! You can choose any cherry pie filling; store-bought works great for convenience. If you’re feeling adventurous, try homemade cherry filling for a fresh twist! Alternatively, feel free to substitute with other fruit fillings like blueberry or apple to customize your bites.
How should I store leftover Cherry Pie Bites?
To store your bites, place them in an airtight container. They will keep at room temperature for up to 2 days. If you want to prolong their freshness, move them to the refrigerator, where they can last for up to 5 days. Reheating them in the oven for about 5-7 minutes will help restore their crispness!
Can I freeze Cherry Pie Bites, and how?
Yes, you can freeze both baked and unbaked Cherry Pie Bites! To freeze unbaked bites, assemble them as usual, then lay them on a baking sheet and freeze them until solid. Once frozen, transfer them to a freezer-safe bag or container for up to 2 months. For baked bites, store them in an airtight container and refrigerate right after they cool completely; they can also be frozen and reheated directly from frozen.
What should I do if my Cherry Pie Bites leak during baking?
If you experience leaking, it could be due to overfilling the bites. For future batches, aim for about 1 teaspoon of filling per bite to avoid this. Make sure to pinch the seams tightly or crimp the edges with a fork for an extra secure seal. If they do leak, don’t worry; they’ll still taste delicious!
Are there any dietary considerations with these Cherry Pie Bites?
Definitely! For gluten-free options, you can use gluten-free crescent roll dough or puff pastry. Additionally, to keep it dairy-free, you might skip the cream cheese or use a dairy-free alternative. Always check labels for allergies, especially with pre-made fillings, to ensure they meet any dietary restrictions!
Irresistible Cherry Pie Bites: Quick & Easy Dessert Delight
Ingredients
Equipment
Method
- Preheat your oven to 375°F (190°C) and line a baking sheet with parchment paper.
- In a small bowl, mix the cream cheese, powdered sugar, and vanilla extract until smooth.
- Unroll the crescent dough and separate it into triangles.
- Place about a teaspoon of cream cheese mixture at the wide end of each triangle, followed by 1-2 teaspoons of cherry pie filling.
- Fold the corners of each triangle over the filling and pinch the seams tightly to seal.
- Arrange the sealed bites on the baking sheet and brush with melted butter. Sprinkle with coarse sugar if desired.
- Bake for 10-12 minutes or until golden brown and puffed up.
- Let cool slightly before drizzling with optional powdered sugar glaze.
Leave a Reply