
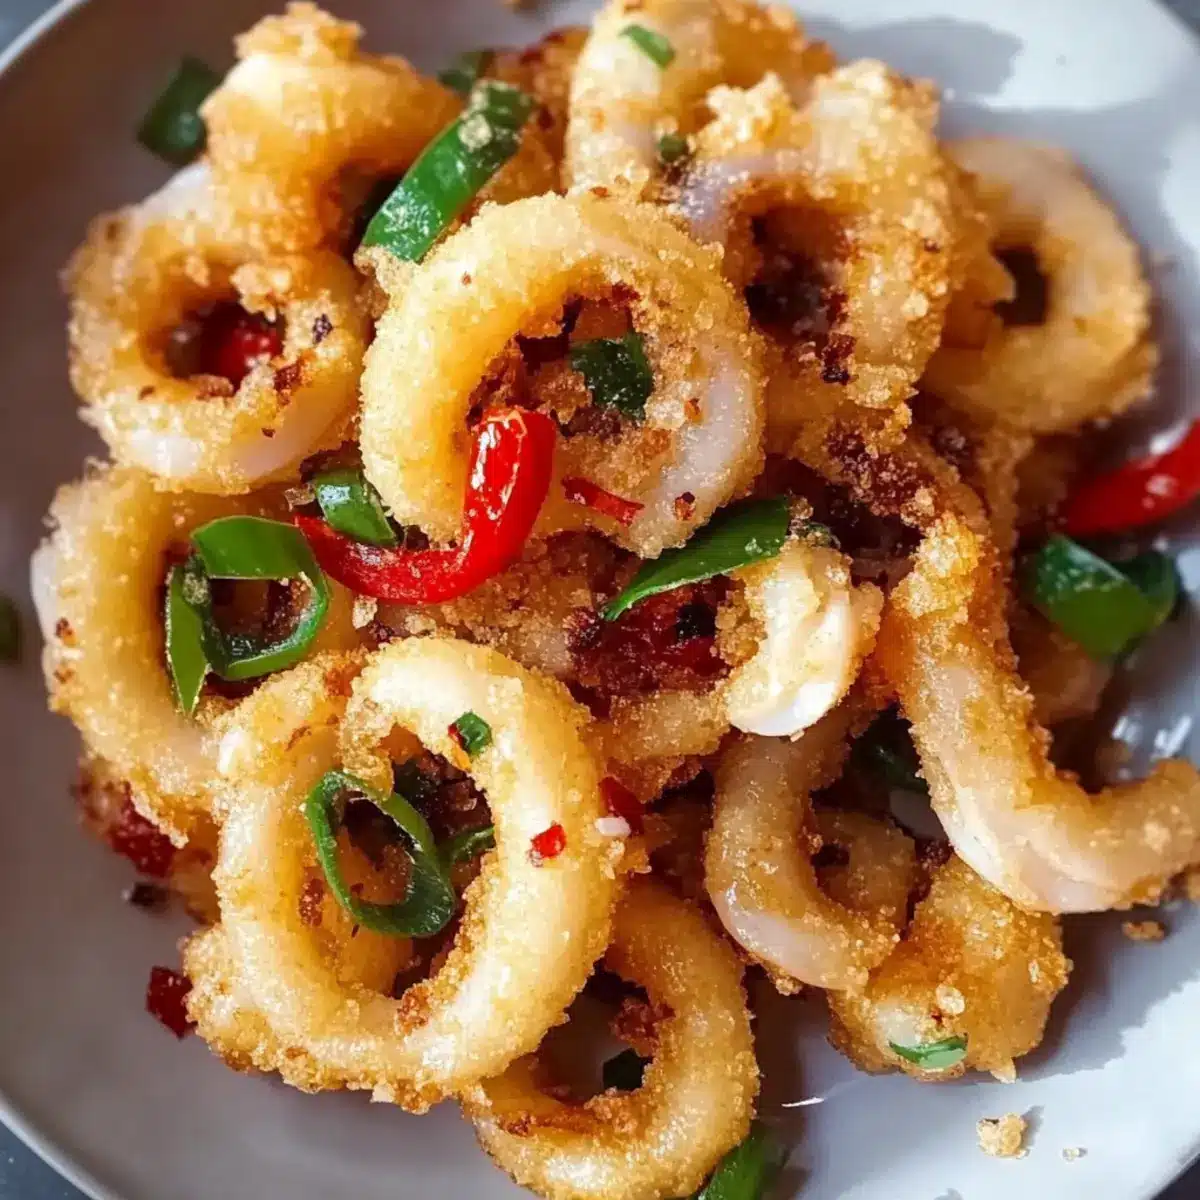
The moment the oil begins to bubble and shimmer, my kitchen transforms into a culinary haven, igniting my anticipation for Crispy Salt and Pepper Squid. This delightful dish not only captures the essence of popular Chinese cuisine but also brings a satisfying crunch that’s hard to resist. In just a few simple steps, you can whip up a scrumptious appetizer or main course that will impress your family and friends. Not only is this recipe quick to prepare, but it also offers a fun twist on traditional fried squid, packed with savory, peppery goodness and a hint of spice. With a light batter that creates an irresistible golden crust, this dish is sure to become a favorite in your home. Are you ready to dive into this seafood sensation?
Why is Crispy Salt and Pepper Squid a Must-Try?
Unforgettable crunch: Each bite of this dish delivers an incredible texture contrast, with a crispy exterior enveloping tender, sweet squid.
Quick and easy: This recipe simplifies the frying process, allowing you to create a gourmet dish in mere minutes, perfect for busy weeknights or impromptu gatherings.
Crowd-pleaser: Impress your guests with these vibrant flavors, making it a versatile option for appetizers or main courses that’ll have everyone coming back for more.
Flavor explosion: The harmonious blend of salt, white pepper, and fresh scallions sets this dish apart, offering a delightful taste of Chinese cuisine right from your kitchen.
Adjustable heat: Tailor the spice level to your preference by adjusting the amount of red chilies, ensuring that everyone enjoys this delightful seafood sensation just the way they like it.
Perfect pairing: Consider serving with a side of steamed rice or vibrant stir-fried vegetables for a balanced meal, similar to my Light Healthy Broccoli dish.
Salt and Pepper Squid Ingredients
For the Squid
• Squid – Ensure it’s cleaned and cut into rings for even cooking.
• Oil (for frying) – Use a neutral oil suited for high heat to achieve that perfect fry.
For Flavoring
• Chopped scallions – Adds fresh flavor and a crunchy texture; substitute with green onions if needed.
• Chopped red chilies – Brings in the heat; adjust the quantity based on your spice tolerance.
• Salt – Enhances the overall flavor; feel free to adjust to taste.
• Ground white pepper – This key seasoning adds warmth and depth; can be replaced with black pepper, though the flavor will differ.
For the Frying Batter
• All-purpose flour – Provides structure and crunch; can substitute with gluten-free flour for a GF version.
• Cornstarch – Enhances crispiness; no direct substitute, but reducing flour can help.
• Baking soda – Aids in creating a light batter.
• Egg white – Binds the batter; for a vegan alternative, consider using aquafaba.
• Water – Hydrates the batter; adjust the amount for desired thickness.
• Pinch of salt – Levels up the batter’s flavor; don’t skip this step!
This preparation will guide you toward creating the most scrumptious Salt and Pepper Squid on your next culinary adventure!
Step‑by‑Step Instructions for Salt and Pepper Squid
Step 1: Prepare the Squid
Start by rinsing the squid under cold water. Pat the cleaned squid dry thoroughly with paper towels to remove excess moisture, which is crucial for achieving a perfect crispy texture. Next, cut the squid into evenly sized rings, about ½ inch wide, ensuring they will fry uniformly.
Step 2: Make the Batter
In a mixing bowl, whisk together 1 cup of all-purpose flour, ¼ cup of cornstarch, ½ teaspoon of baking soda, and a pinch of salt. In a separate bowl, combine 1 egg white with ¾ cup of cold water. Gradually add this mixture into the dry ingredients, stirring until you achieve a smooth, lump-free batter. This batter will give the Salt and Pepper Squid its delightful crunch.
Step 3: Coat the Squid
Dip each squid ring into the prepared batter, ensuring that each piece is evenly coated. Lift the squid from the batter, allowing any excess to drip off before placing them onto a plate. This step is essential to prevent clumping during frying, ensuring a beautifully crisp finish for your Salt and Pepper Squid.
Step 4: Heat the Oil
In a wok or deep frying pan, pour in 2-3 inches of neutral oil and heat it to 350°F (175°C). Use a thermometer to monitor the temperature, as this will achieve the ideal frying conditions. Once the oil shimmers and bubbles, you are ready to begin frying your squid.
Step 5: Fry the Squid
Carefully drop the coated squid rings into the hot oil in small batches, frying them for about 2-3 minutes. Avoid overcrowding the pan, as this can drop the oil temperature and result in soggy squid. Fry until the squid turn a golden brown, keeping an eye on them to avoid overcooking.
Step 6: Drain the Squid
Using a slotted spoon, remove the fried squid from the oil and transfer them to a plate lined with paper towels. This will help absorb any excess oil, leaving you with crispy Salt and Pepper Squid that is not greasy. Allow them to drain for a couple of minutes, ensuring they maintain their delightful crunch.
Step 7: Stir-Fry the Seasonings
In a skillet, heat ½ tablespoon of oil over high heat. Add in the chopped scallions and sliced red chilies, stir-frying rapidly for about 30 seconds until fragrant. The high heat will enhance the flavors, creating a perfect balance to accompany your fried squid.
Step 8: Combine and Serve
Add the drained squid to the skillet, seasoning generously with salt and ground white pepper to taste. Stir everything together until well combined and heated through, which should take about a minute. Serve your delicious Salt and Pepper Squid immediately, garnished with extra scallions and chilies for a vibrant appeal.

Expert Tips for Perfect Salt and Pepper Squid
Temperature Check: Make sure your oil is at 350°F (175°C) before frying; if it’s too cool, the squid can absorb excess oil and become greasy.
Small Batches: Fry the squid in small batches to help maintain the oil temperature and avoid steaming, which results in a soggy texture.
Watch the Time: Keep an eye on frying time; overcooking can lead to rubbery squid. Aim for that perfect golden brown in just 2-3 minutes.
Fresh Finishes: After frying, quickly stir-fry the scallions and chilies to enhance their flavors. Adding them post-fry elevates the overall taste of the Salt and Pepper Squid.
Coating Consistency: Ensure each squid ring is evenly coated in batter to prevent clumping during frying. A smooth batter is key for that pleasant crunch!
How to Store and Freeze Salt and Pepper Squid
Room Temperature: It’s best enjoyed immediately for optimal crispiness; avoid leaving it out for more than 2 hours to ensure freshness and safety.
Fridge: Leftovers can be stored in an airtight container in the refrigerator for up to 1 day. Reheating may sacrifice some crispness, so enjoy it fresh when possible.
Freezer: If you’d like to prepare in advance, freeze the battered but uncooked squid rings in a single layer on a baking sheet, then transfer to a bag for up to 2 months. Fry from frozen for a delightful treat!
Reheating: To reheat, place leftovers in a preheated oven at 350°F (175°C) for about 10 minutes to restore some crunch, avoiding microwaving, which may make them soggy.
Make Ahead Options
Crispy Salt and Pepper Squid is a fantastic recipe for meal prep enthusiasts! You can prepare the squid rings and coat them in the batter up to 24 hours in advance, covering them tightly and refrigerating to maintain freshness. The key is to ensure the squid is completely dry before battering, as moisture can compromise crispiness during frying. If you want to save even more time, you can also chop the scallions and red chilies ahead of time and store them in the refrigerator for an additional up to 3 days. When ready to serve, simply heat oil and fry the squid rings, followed by a quick stir-fry with your prepped seasonings, ensuring that your Crispy Salt and Pepper Squid is just as delicious as when freshly made!
What to Serve with Crispy Salt and Pepper Squid?
Each delightful crunch of salt and pepper squid dances on your palate, so why not build a meal around this savory treat?
-
Steamed Jasmine Rice: The soft, fragrant rice provides a neutral base that balances the squid’s bold flavors, soaking up any lingering seasoning.
-
Stir-Fried Vegetables: A mix of vibrant colors and crisp textures from bell peppers, broccoli, and snap peas add freshness and crunch to your meal, making it both flavorful and nutritious.
-
Garlic Noodles: These slippery noodles coated in garlic and butter make for a comforting side, uniting flavors that mirror the peppery notes of the squid.
-
Asian Slaw: A refreshing salad with shredded cabbage, carrots, and a tangy sesame dressing offers a nice contrast in texture, heightening the meal’s overall experience.
-
Sweet Chili Sauce: For a fun dipping sauce, serve alongside sweet chili dip. Its sweetness works beautifully with the squid’s savory spice.
-
Chilled White Wine: A glass of chilled Sauvignon Blanc brightens the meal with citrus notes, perfectly complementing the squid’s crunch and spiciness.
-
Mango Sticky Rice: As a delightful dessert, the sweetness of ripe mango paired with creamy coconut sticky rice rounds off the meal beautifully, balancing out the dish’s savory elements.
Salt and Pepper Squid Variations
Feel free to get creative and adapt this delightful dish to your taste preferences and dietary needs!
- Gluten-Free: Substitute all-purpose flour with gluten-free flour to enjoy the same crispy texture without the gluten.
- Vegan Twist: Use aquafaba in place of egg white for a vegan-friendly batter, keeping all that crunch intact.
- Flavor Boost: Add a teaspoon of garlic powder or smoked paprika to the batter for a delightful flavor twist.
- Spice it Up: Incorporate cayenne pepper into the salt and white pepper mix for an exciting, fiery kick.
- Herb Infusion: Mix in finely chopped fresh herbs like cilantro or basil into the batter for an aromatic touch.
- Crispy Add-Ins: Toss in some panko breadcrumbs along with the flour for extra crunch on the squid.
- Zesty Dip: Serve with a zesty lemon or lime dipping sauce, maybe a hint of garlic to brighten flavors, echoing that sweet chili sauce vibe.
- Asian Fusion: Instead of scallions, try thinly sliced leeks or bok choy for a different texture and taste, reminiscent of a vibrant stir-fry.
For a breezy meal accompaniment, consider serving your Salt and Pepper Squid alongside a side of Shrimp Corn Soup or some vibrant Fried Cabbage Noodle buns to complement the seafood flavors beautifully!

Salt and Pepper Squid Recipe FAQs
How do I choose the right squid for this recipe?
Absolutely! When selecting squid, look for fresh, firm specimens. Ensure they have a clean, slightly oceanic scent and are free of dark spots all over, which indicate age. You can ask your fishmonger for cleaned squid, or if you purchase whole squid, be sure to clean them thoroughly, removing the ink sac and skin.
How should I store leftover Salt and Pepper Squid?
You want to keep your leftovers fresh for as long as possible! Store them in an airtight container in the refrigerator for up to 1 day. Just remember, the longer they sit, the less crispy they’ll be. For the best experience, enjoy them fresh right after frying!
Can I freeze Salt and Pepper Squid?
Yes, you can! To freeze, first batter the squid rings but do not fry them. Arrange them in a single layer on a baking sheet and freeze until solid, about 1-2 hours. Once frozen, transfer them to a freezer-safe bag and they can last up to 2 months. Fry from frozen without thawing for quick, delicious squid when you crave it!
What should I do if my batter is too thick or runny?
Very good question! If your batter is too thick, gently whisk in a little more cold water to achieve a smooth, pourable consistency. Conversely, if it’s too runny, you can gradually add a bit more flour or cornstarch until it thickens up to your desired texture. Finding that perfect balance is essential for a crispy coating!
Are there any dietary considerations to keep in mind?
Yes, indeed! Salt and Pepper Squid is not suitable for individuals with shellfish allergies. For those on gluten-free diets, you can swap all-purpose flour with a gluten-free flour blend for the batter. Additionally, if you’re making this dish vegan, consider using aquafaba instead of egg whites in the batter, ensuring the dish still captures that delightful crunch.
Crispy Salt and Pepper Squid - A Simple Gourmet Treat
Ingredients
Equipment
Method
- Rinse the squid under cold water and pat dry thoroughly.
- Cut the squid into evenly sized rings, about ½ inch wide.
- In a bowl, whisk together flour, cornstarch, baking soda, and a pinch of salt.
- In another bowl, combine egg white with cold water and mix into dry ingredients to form a smooth batter.
- Dip each squid ring into the batter, ensuring an even coat.
- Heat oil to 350°F (175°C) in a wok or deep frying pan.
- Fry squid rings in small batches for 2-3 minutes until golden brown.
- Remove fried squid and drain on paper towels.
- Stir-fry chopped scallions and chilies in a skillet with a bit of oil for 30 seconds.
- Add drained squid to skillet, season with salt and pepper, and combine.
- Serve immediately, garnished with extra scallions and chilies.
Leave a Reply